


Touchdown pages are very helpful instruments for enhancing your on-line advertising campaigns, important for capturing leads, new potential prospects.
You’ll be able to at all times drive visitors from Google Ads campaigns, social networks, or newsletters to your web site, however there are distractions on your property web page.
It is vitally simple for these folks to not find yourself signing up. They may begin clicking on different hyperlinks or banners.
Generally you is likely to be serious about that, however different occasions you simply need them to join.
If you wish to do this, you should utilize a registration web page, which is often known as a touchdown web page.
There are lots of good instruments on the market for creating touchdown pages. Though most providers have a moderately essential downside:
- They don’t provide integration with Mailrelay.
And that may be a major problem, as a result of it generates many limitations.
That’s why at Mailrelay we’ve created our personal touchdown web page editor. It is vitally simple to make use of and absolutely built-in into your Mailrelay account. This fashion, it is possible for you to to ship a publication instantly to all of your new leads.
Within the first paragraphs, I’ll let you know a bit concerning the definition and normal ideas of registration touchdown pages. After that, I’ll present you methods to create a brand new touchdown web page in only a few clicks:
What’s a registration touchdown web page?
Though I’ll spend most of my time explaining methods to create a touchdown web page, I have to first lay the foundations of this idea in order that, later, you’ll perceive the steps for creating your first touchdown web page with our electronic mail advertising software program.
The very first thing to do is to outline what a “registration touchdown web page” is. The aim of this sort of web page is to gather knowledge from guests (their identify and electronic mail tackle, for example).
In different phrases, you create a signup touchdown web page to seize private knowledge from individuals who entry it. So the aim of touchdown pages is to transform guests into new leads.
A registration touchdown web page is the gateway to your enterprise. The variety of leads or potential prospects you possibly can have will depend upon its construction, components and texts.
The concept of such a web page is to supply a clear, easy design, with no hyperlinks or buttons apart from the subscription button. It additionally has no navigation menu and barely comprises a headline, a advantages part and a type.
The best method to create them is thru a creator or visible editor such because the one supplied by Mailrelay, which we’ll see immediately.
However, you will need to spotlight that the provide promoted in such a pages is normally of curiosity to the audience and free. You need to provide one thing related to persuade them to fill of their knowledge.
Often, this free present known as a lead magnet. Relying on the character of the enterprise, it is going to be of 1 sort or one other. Some examples are:
● Ebooks.
● Programs.
● Software program trial.
● Templates.
● First session free of charge.
● Different reductions.
A lead magnet is a invaluable useful resource that corporations can provide to persuade guests to trade their private knowledge for the present they are going to obtain free of charge; if you understand how to make use of this knowledge, you should have many potential prospects.

Key components for making a registration touchdown web page
Once we discuss conversion in a registration touchdown web page, we’re referring to the % of people that left us their knowledge or, what’s the identical, the success charge of the web page.
As a way to encourage your guests to depart their knowledge within the type, this web page should embrace sure components. I’ll describe all of them under.
However, first, I might additionally like to say {that a} conversion can have completely different aims relying on the kind of provide and the kind of enterprise. For instance, we might discuss:
● Subscriptions for an occasion.
● Registrations for a free session.
● Information for obtain.
● Software program trial.
● Get reductions and bonuses.
When making a registration touchdown web page, you need to take note of that the very first thing the consumer will see would be the header. It needs to be engaging sufficient for them to maintain studying and, on the finish, full the subscription type.
The header consists of:
Title:
The title corresponds to the principle promise of your provide or lead magnet. It needs to be highly effective, however on the identical time credible. To create it, I like to recommend you to base it on the principle benefit of what you might be providing.
That’s, the primary motive why your guests want your lead magnet. One other advice is to ask questions, for instance “How” and “why”.
You too can create sentences that embrace an objection. For instance “Methods to optimize the efficiency of your PC with none technical data”.
Subtitle:
The details about the header could be expanded under. If it have been an occasion, you can use the subtitle to point out probably the most related data. In another state of affairs, it would serve to specify who the lead magnet is for.
Button:
Lastly, the header ought to embrace a button that may take guests on to the shape on this identical web page. It’s important that it stands out from the remainder of the weather and that it has a copywriting textual content aligned with what you might have promised.
If we are attempting to advertise a free occasion, the button might say one thing like “I wish to register now”.
Benefits
After the header, the reader might want to discover extra causes to entry the obtain, occasion or promotion you might be providing. Due to this fact, a bit on the benefits of the provide needs to be added under.
You’ll be able to present etween 3 and 5 benefits. If we add too many textual content, we could lose the eye of tourists. On this case, you need to embrace solely the very important data to persuade guests to entry the shape.
However, it’s higher to create the textual content within the type of bullet-pointed lists or another visually interesting and easy-to-read structure.
Type
If we discuss making a registration touchdown web page, the shape would be the key and basic piece. By it, guests might be transformed into leads or business prospects. Due to this fact, we will’t overlook about that.
As a major tip, I might say that it’s best to maintain the shape brief and to the purpose. So you need to solely request probably the most related details about your leads. A priori, the identify and electronic mail tackle might be sufficient.
You will need to be aware {that a} type with solely two fields has a better success charge than one with 5, seven or ten.
Regardless of how advantagious and engaging your provide is, if the shape is simply too lengthy and also you ask for an excessive amount of data, customers could abandon the registration course of.
Different points you need to take into account
Up to now we will say that we’ve described the important thing components of a registration touchdown web page, however there are different elements that needs to be thought-about. As an illustration:
● Pictures. If you’re going to add photos, select good high quality ones which might be actually associated to what you might be providing. That’s, if the picture provides worth to your goal, sure, you need to embrace it. In any other case, it will be higher to create a touchdown web page with out photos.
● Quick loading pace. One other essential issue is web page loading pace. Do not forget that customers abandon gradual loading web sites.
● Testimonials. Lastly, you probably have testimonials you could share, it will be advisable so as to add one so as to add another excuse to inspire guests to register.

Methods to create a touchdown web page with Mailrelay, first steps with the touchdown web page editor
Now we’re going to see the most typical steps for making a easy touchdown web page with a registration type.
The very first thing you need to do is to create a brand new opt-in type, on “Subscribers” -> “Signup Varieties“, as a result of you’ll use this type when creating a brand new touchdown web page.
In the event you don’t have a subscription type but, you possibly can create a primary one following the steps you possibly can see here.
After that, you possibly can click on on Touchdown pages -> Add to create a brand new one.
After naming it you’ll get a display like the next one:
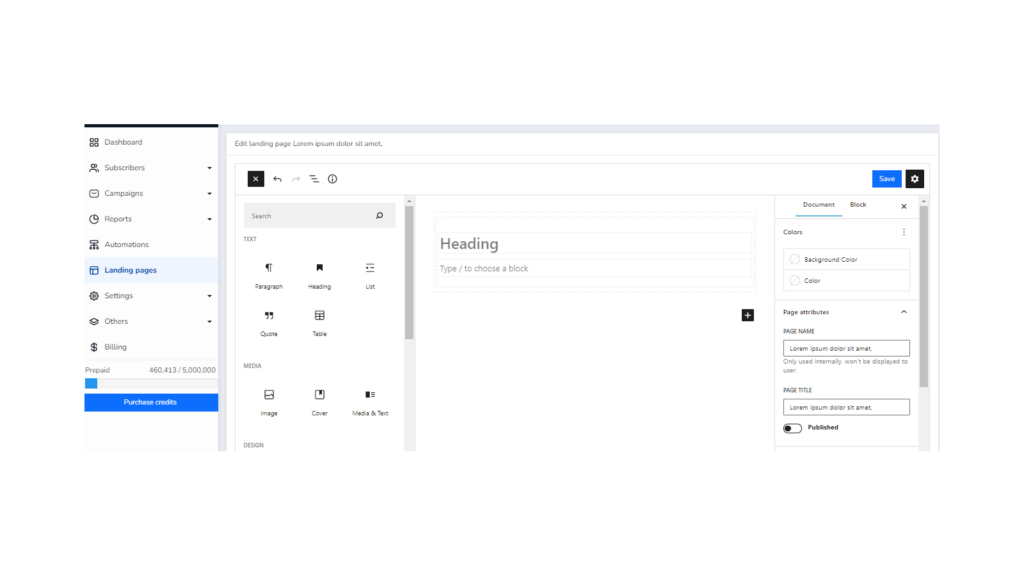
This web page is split into three major sections, from left to proper:
- Parts part. These are the completely different blocks you could add to the touchdown web page. You solely want to pull and drop them within the central space (content material).
- Content material. This could be a visualization and work space the place we will add content material to the touchdown web page. We are able to begin to see what it would appear like.
- Choices. The correct column will present the completely different choices for the chosen merchandise, or for the web page as an entire if no merchandise is chosen.
We’ll now work by these choices, step-by-step.
Choose background colour
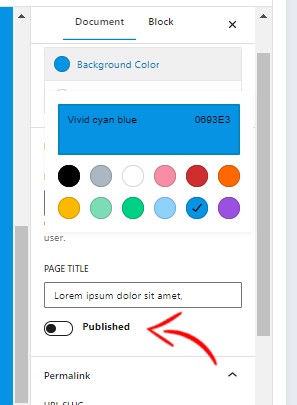
One of many first choices we will use is to pick the background colour of the whole registration touchdown web page.
You’ll be able to hold the default colour (white), however generally you might determine to make use of one other background colour that matches higher along with your model. This might be finished from the choices block:
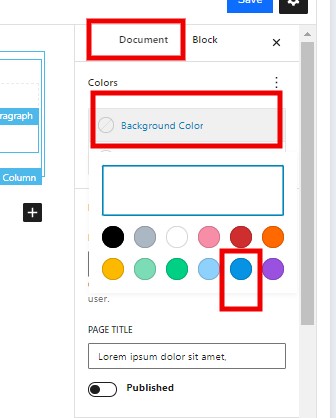
On this case, as I mentioned, we’ll go to the proper column, doc part after which select the “Background colour” choice.
This choice will change the background of the web page to the chosen colour.
Deciding on the background colour of the principle container
To work with this job, we’re going to have a look at one other of the editor’s major instruments, the listing view.
This listing view is a really great tool, and is one thing you’ll continuously use to raised edit your touchdown web page, so let’s see:
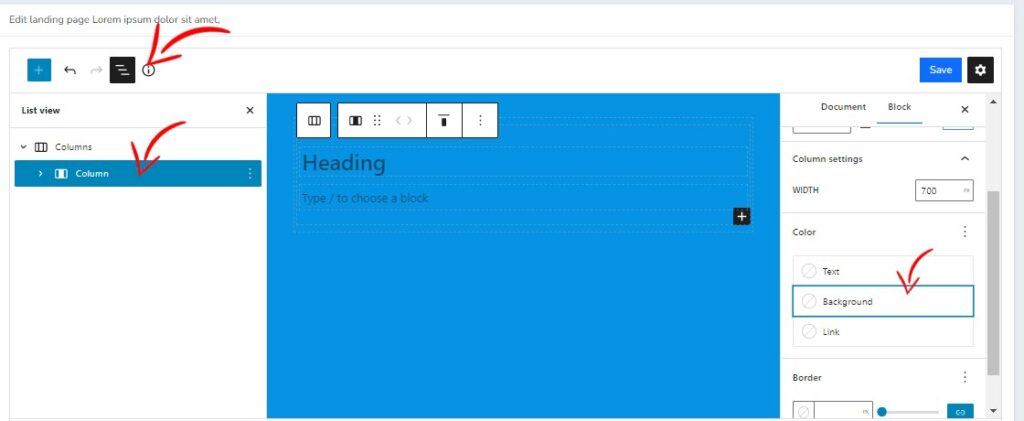
The listing view is displayed by clicking on one of many icons within the higher left space, the fourth icon. While you click on on it, the system will show a listing of all itens of the touchdown web page organized hierarchically.
That may assist you to show the block choices for every of the itens, and even transfer them to completely different positions on the display. Group them inside one another, and many others.
As soon as a function is chosen, the proper column exhibits the choices for that individual block. For instance we will choose the background colour, or modify the width.
Within the picture above you possibly can see, on the proper, how the arrow factors to the “background” choice.
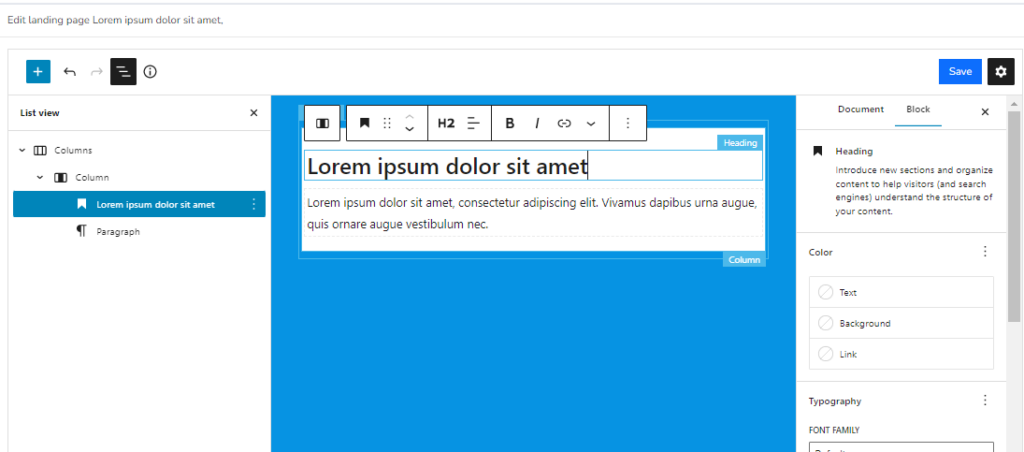
The default construction we’ve as quickly as we create the touchdown web page is
- A bigger major column
- With one other, much less huge inside column
Why are we utilizing this construction with one column inside the opposite?
We use this structure in order that the inside column at all times stays centered on the display. It’s attainable to see two choices in the proper column:
- Content material. This could be the width of the content material.
- Width. This could be the utmost width of the column.
On this approach, by setting the width of the content material as smaller, we’d have a margin between the border of the container and the content material itself.
On the proper of the picture you possibly can see how the utmost width of the column has been set to 900px, whereas the width of the content material has been set to 850 px. Thus leaving a small margin.
Dragging itens to the registration touchdown web page
Now let’s see methods to add new choices to the work space in only a few clicks:
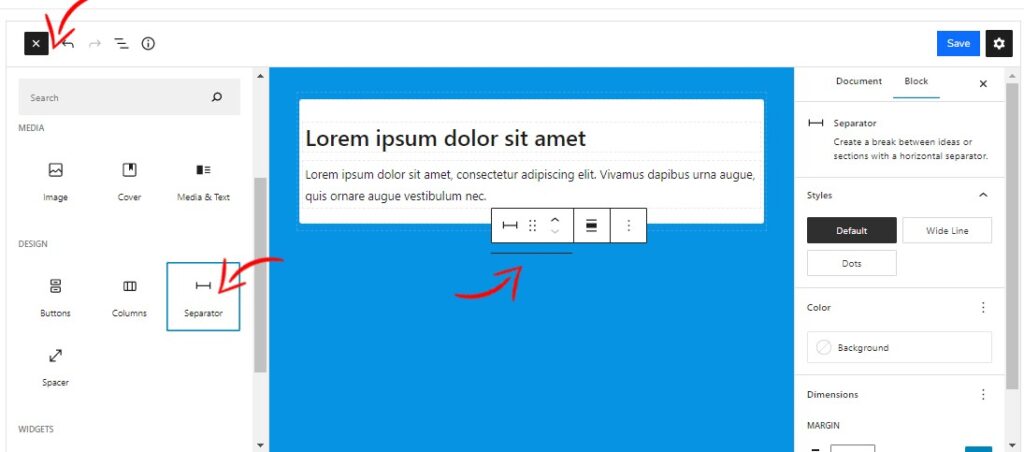
The very first thing to do is to pick the function within the left space, a separator on this case, and drag it with the mouse to the specified location within the content material space.
By transferring the mouse over the content material space, we will see a blue bar, indicating the meant location of the content material.
Structuring the touchdown web page contents
Even when you’ll use a clear design in your touchdown web page, it would be best to add a specific amount of content material to it. One of many best methods to construction the touchdown web page is thru the usage of columns:
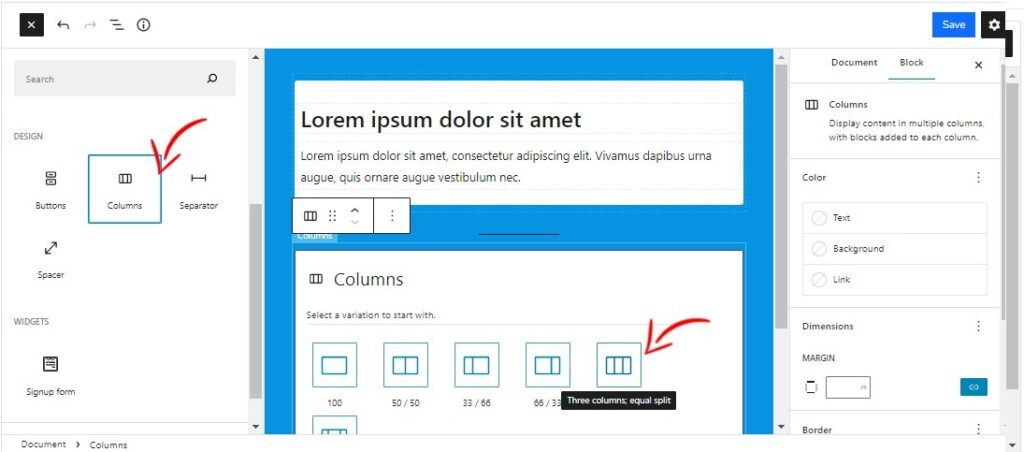
As you possibly can see within the picture, there are a number of column choices. A really helpful choice is the three-column function, as a result of it would permit us to make use of the center column as a content material separator.
Now you will notice what I imply:
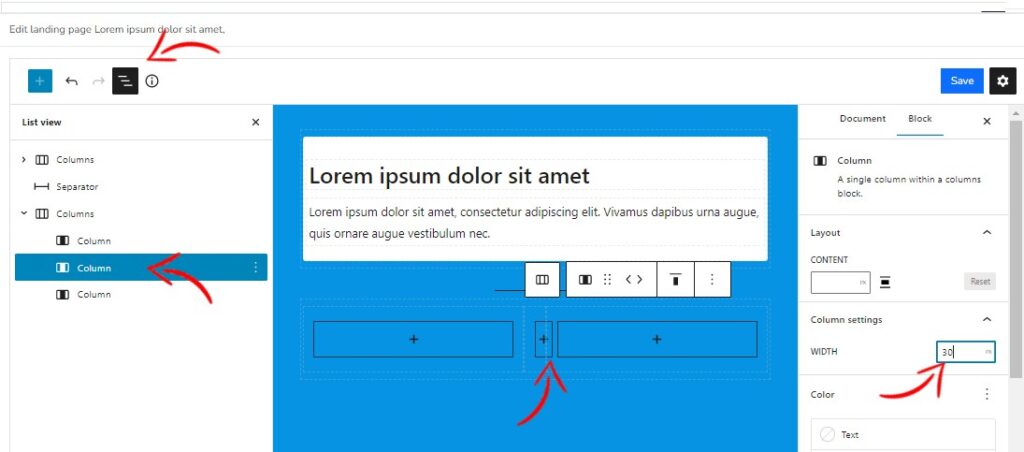
After including the columns you possibly can go to the “listing view” and choose the center column, on the proper within the block column, you will notice that the “width” area is empty. But when we outline right here a width of 50px that column might be diminished and might act as a separator.
That approach the columns won’t be joined collectively, which might make studying troublesome.
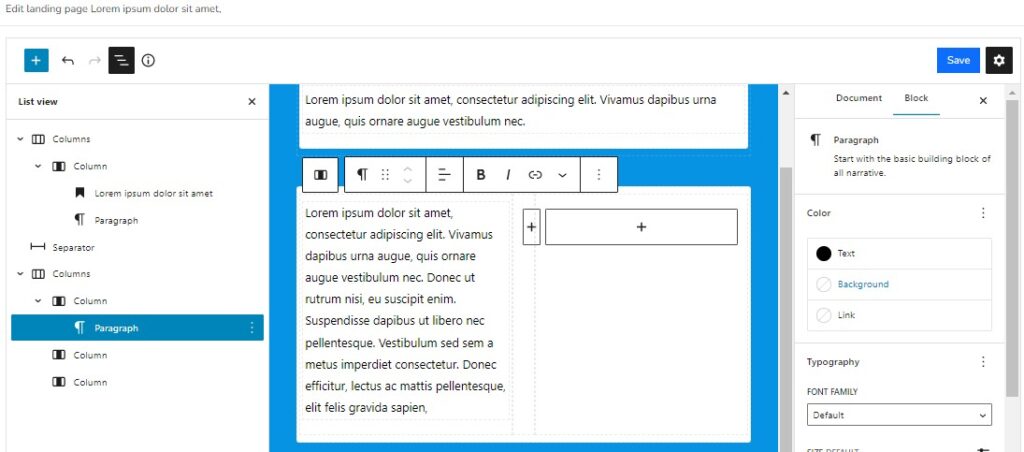
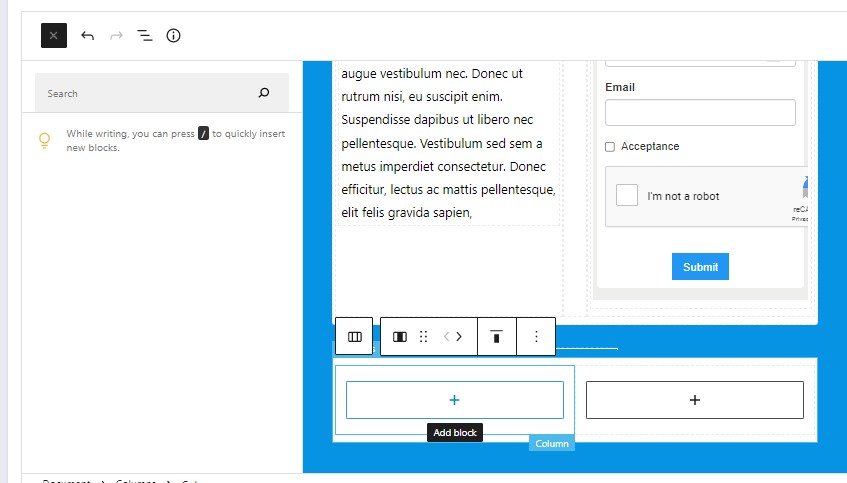
After that you just solely must click on on the “+” image. so as to add content material to the columns.
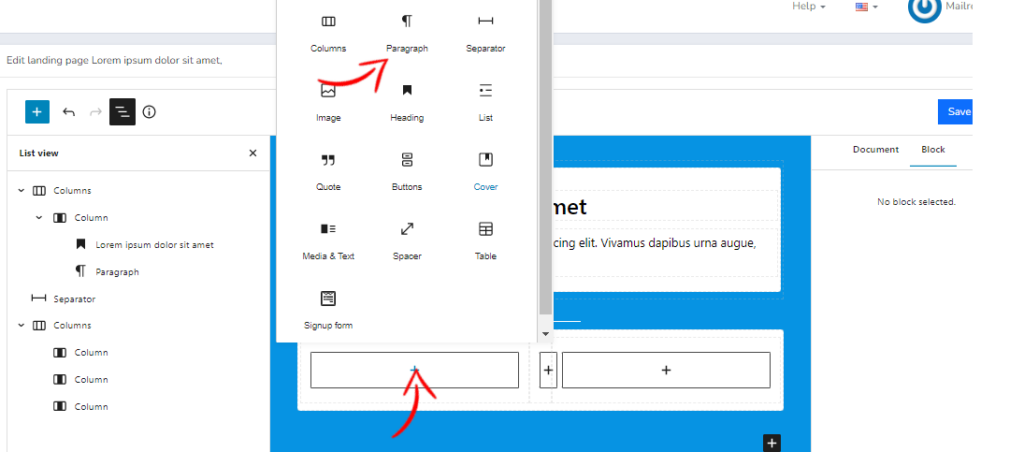
Discover that by clicking on the “+” image, the choice permits you to select between the obtainable blocks, on this case for instance a paragraph.
And if we add content material to it, the design would appear like this:
Within the instance we’ve additionally added a “Listing” block under the paragraph. It’s attainable to proceed including components to this column by following the identical steps. For instance, extra paragraphs, photos, and many others.
Now we’ll repeat the method, however with one change and add a type within the third column:
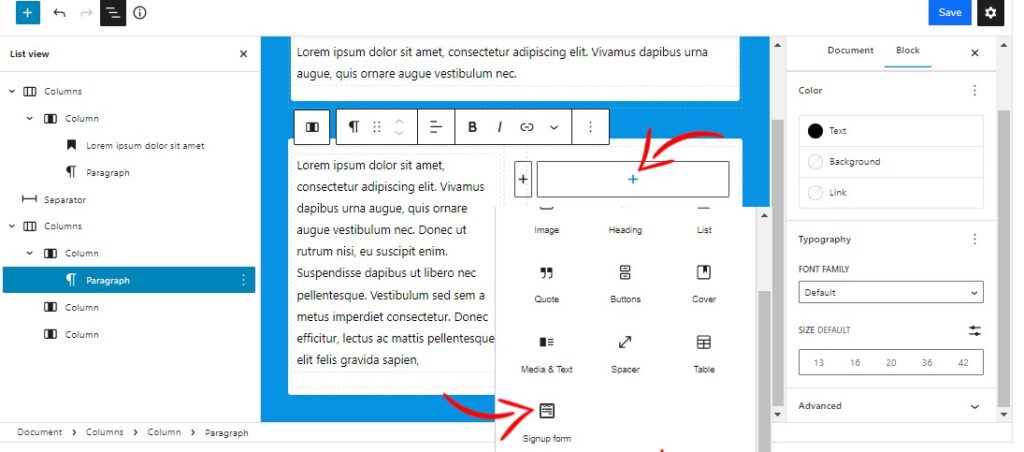
As I mentioned at first, we’ll solely have the ability to select among the many current kinds. Due to this fact, it’s essential that you’ve got beforehand created the kinds that you’ll use:
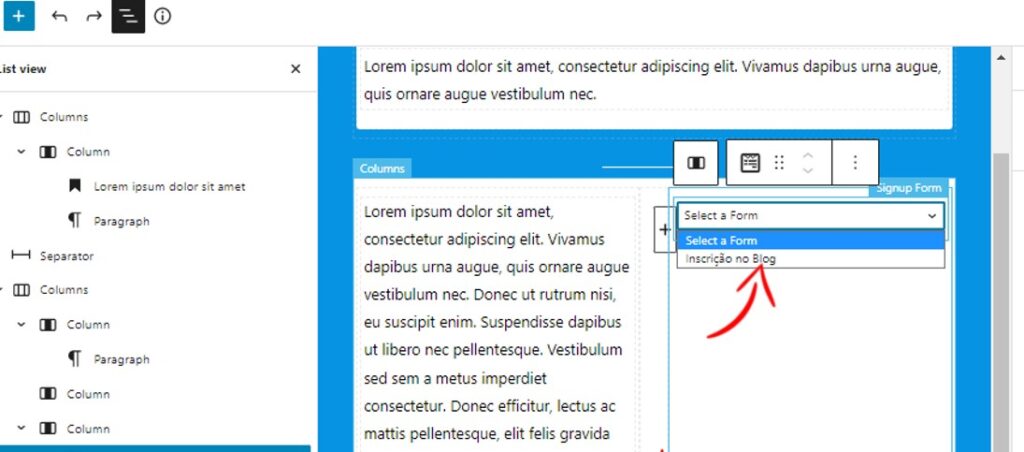
As soon as chosen, the shape might be embedded in your touchdown web page:
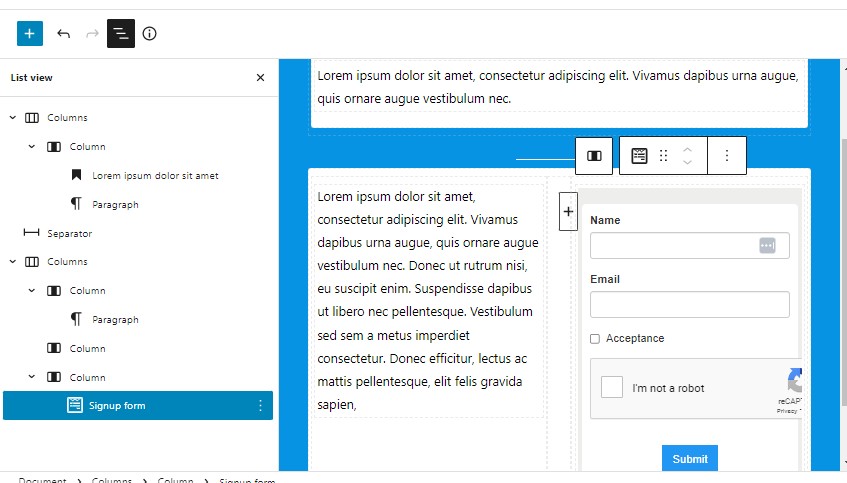
The configuration of the background colour of the shape, in addition to the remainder of the itens, is finished within the kinds part itself, it’s not attainable to make these modifications within the creation of the touchdown web page.
That’s, the shape might be displayed on this part as you might have configured it.
In the event you change something sooner or later, remember the fact that any modifications made to the shape might be mirrored within the touchdown web page.
Including photos to the web page
Pictures are a vital a part of any gross sales or registration web page. Including them is easy, now let’s add a picture with a textual content subsequent to it. To do that we’ll first add two extra columns under the earlier ones:
What we’re going to do is to make use of the left column so as to add a picture, and the proper one so as to add a paragraph. This fashion the content material might be appropriately structured and legible.
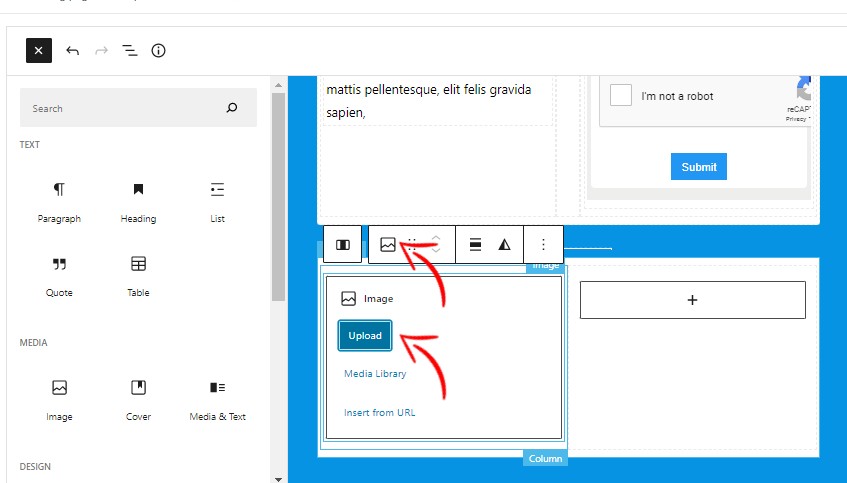
You should use a picture that you’ve got already uploaded to Mailrelay, or add a brand new one out of your pc.
Nevertheless, remember the fact that the modifying capabilities of the touchdown web page editor are restricted, so you need to add the photographs already optimized.
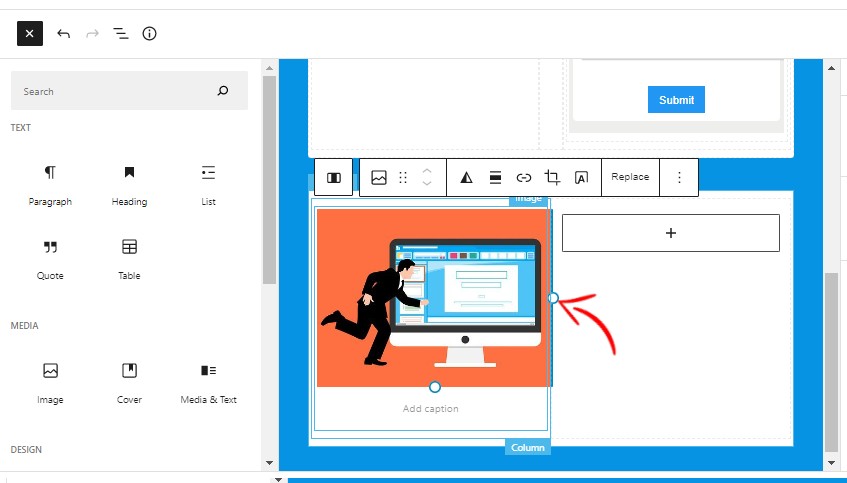
While you click on on the picture, you will notice two circles. This selection will assist you to stretch it to the scale you need. Though, as I discussed earlier than, it’s a very restricted function, so it’s higher to add the picture prepared to make use of.
On the proper, within the block choices, we will additionally change the width or set another textual content attribute for the picture.
Though it’s not really useful so as to add itens that will distract guests from the principle motion, as that is an instance article, we’ll see methods to add a button.
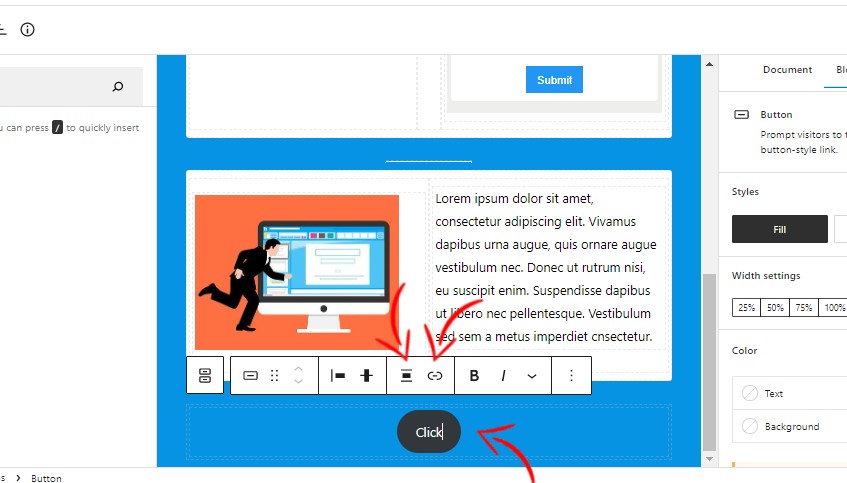
Within the picture we’ve highlighted the choices that assist you to choose the alignment of the button, for instance to heart it, and the choice so as to add a hyperlink for a particular motion.
Now I’m going to point out you a picture with the ultimate end result:
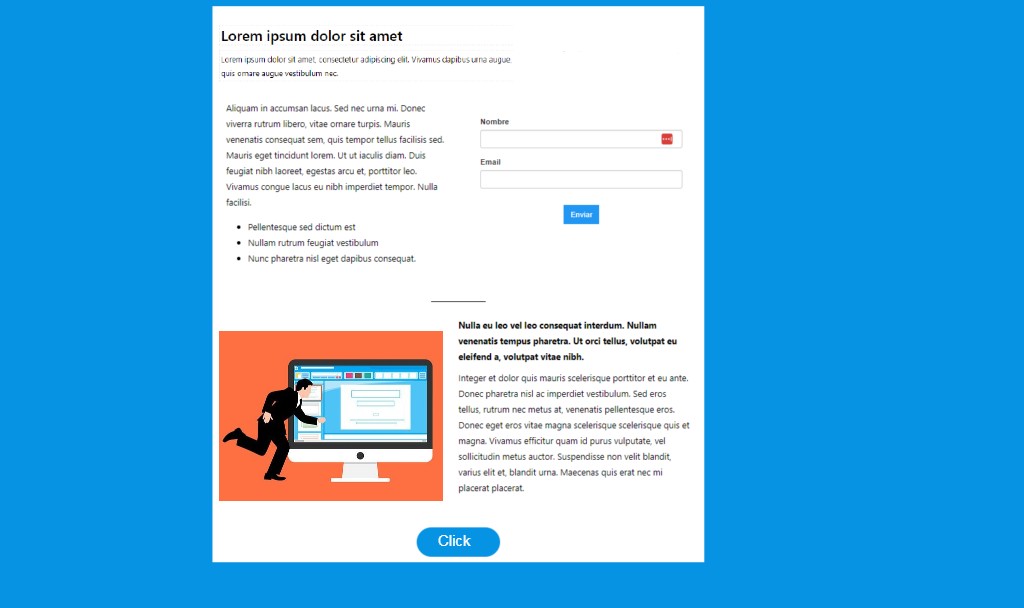
In brief, a useful gizmo for getting new leads
We’ve created a easy registration touchdown web page, however with the important components to meet its operate.
We suggest that you just run a number of checks, however don’t overlook to publish the web page, in order that it gives you a URL you could share in your campaigns:
We hope that this function will assist you numerous in attracting new contacts.
Source link