

For years, I’d been in search of an app that might let me handle all of the followers in my PC case from one place and hyperlink case fan velocity to the GPU temperature. About 5 years in the past, I discovered it. Since then, Fan Management has been a staple on my PC. I like to recommend it to everybody in want of a fan administration app.
Fan Administration on Home windows PCs Leaves a Lot to Be Desired
After I built a new PC on the tail finish of 2020, I spotted I could not let my GPU’s temperature dictate the velocity of my case fans. I attempted a few fan administration apps I knew about, however none allowed me to create a customized case fan curve with the GPU temperature being the set off. I may solely hyperlink my case followers’ velocity to the CPU or motherboard temperature.
Since I may additionally try this within the BIOS, I deleted the apps, went to the BIOS, and created a customized case fan curve primarily based on the CPU temperature. This labored high-quality, however wasn’t what I wanted. I wished to hyperlink my case followers to the GPU thermals so they might solely ramp up when the graphics card is below load, which roughly occurs solely when gaming.

However, linking case fan RPM to CPU thermals is much from superb, since quite a lot of duties can briefly pressure the CPU and, in flip, ramp up your case followers. For example, I would open my browser, my CPU temperature would spike and the case followers would shoot up. I would then open a bunch of tabs, and the followers would change into noisy once more. The method would repeat time and again all through the day when opening and utilizing applications, opening new browser tabs, and doing any motion that strains the CPU.
This was getting on my nerves as a result of I wished the case followers to be quiet more often than not, solely ramping up throughout gaming. So I hopped on the internet to attempt discovering an app that helps that characteristic. After a surprisingly transient search, I discovered a comparatively new open-source app, Fan Control. It was every part I would been trying to find.
Fan Management Is Simple to Use But Packed With Options
In late 2020, Fan Management was just about contemporary out of the oven. The preliminary model was launched in June of the identical 12 months. Regardless of its dearth of options on the time, the app allowed me to create a trigger-based customized case fan curve that tied their velocity to the GPU temperature. That was just about every part I would been in search of.

Within the intervening years, Fan Management has gotten a ton of useful options. These days, it’s the final fan administration resolution for Home windows PCs. It helps a bunch of various fan curves, permits extremely detailed management of each fan inside your case, has a simple setup, it is easy to make use of, and filled with options.
You’ll be able to create seven completely different fan curve sorts, manually management your followers with sliders, and use a bunch of various temperature sensors as sources for customized fan curves.

Fan Management helps a number of CPU and GPU sensors, in addition to VRM, RAM, SSD, and even PSU thermal sensors if you happen to personal a Corsair PSU.

The app permits you to mix completely different thermal sensors right into a single customized fan curve supply, or embrace a number of current fan curves as a number of sources for a brand new customized fan curve.
For example, you’ll be able to create a customized case fan curve that makes use of each the CPU and GPU fan curves as sources. You’ll be able to then set the energetic supply to be the one below the upper load, thus permitting your case followers to match the velocity of both the GPU or CPU, whichever is below the next load at any given second.

You can even create customized sensor recordsdata and add them to the app, set up third-party plugins, export your fan configurations and use them on a unique PC with the identical fan format, and rather more.
In terms of modifying customized fan curves, you’ll be able to tweak a bunch of variables: sensors that set off fan activation, response time (the period of time after which the fan velocity ramps up or decreases), hysteresis (the distinction in temperature after which the fan velocity will increase or decreases), fan velocity in RPM and share, the variety of steps in graph-based fan curves, and extra.

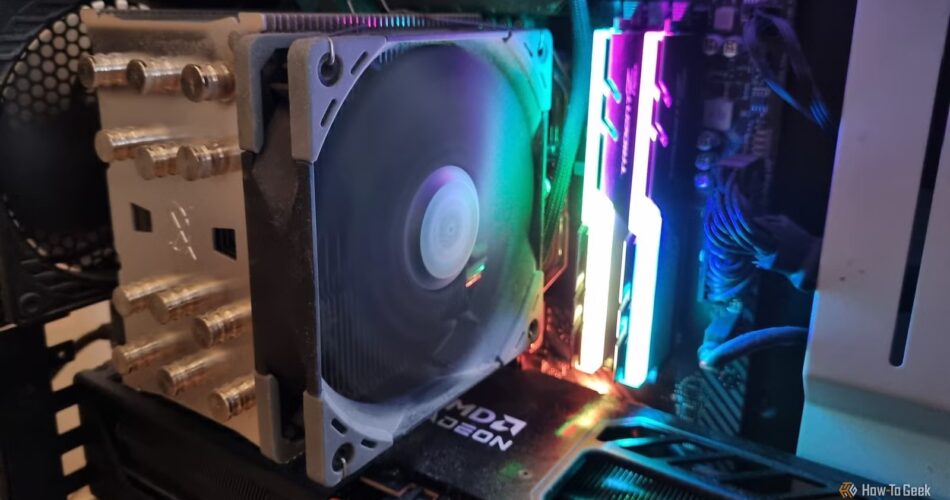
The app helps CPU, GPU, and case followers, AIOs, and even tiny followers present in energetic M.2 SSD heatsinks. So long as you join the fan to one of many fan headers in your motherboard, you’ll be able to management it. In brief, Fan Management ought to acknowledge and management each fan you have received inside your case.
Fan Management additionally contains customized themes, makes use of the open-source LibreHardwareMonitor software program as its backend, permits you to rename every thermal sensor, and is solely free to make use of. In brief, it is bursting on the seams with options, and I would not prefer it every other method.
The Fan Management Setup Process Is a Breeze
Accessing such a mountain of options may look daunting, particularly if you happen to solely wish to match your case fan velocity to the GPU temperature, like I did. Luckily, the Fan Management setup process is moderately simple.
First, obtain the most recent model of the app from the app’s download page. It is strongly recommended to obtain the “.NET 8.0” installer if you happen to’re operating Home windows 11, because it’s primarily based on the most recent .NET Framework model. Be happy to obtain the “.NET 4.8” installer as a substitute if you happen to’re operating an older model of Home windows that is not suitable with the most recent model of the .NET Framework.

Home windows may warn you towards putting in the app; simply click on “Extra data” after which click on the “Run anyway” button. As soon as you put in the app, open it. Now you can learn the EULA or simply click on the “OK” button.
Subsequent, the app will ask you whether or not you wish to run an assisted setup. I like to recommend doing so.

Now you can choose which sensors you wish to use. For those who personal an NVIDIA GPU and wish to create a customized fan curve for it, make sure that to test the “NVAPI” and “NVIDIA 0% {hardware} curve override” packing containers. For those who personal an RDNA AMD GPU, test the “AMD ADLX” checkbox. Subsequent, click on “Okay” to proceed.

Now let the app detect and pair fan management sensors with applicable velocity sensors. Your followers will ramp up to the max, however that is regular. This will take some time as a result of Fan Management will check each fan header discovered in your motherboard in addition to your GPU followers.
Subsequent, it is time for the automated fan calibration, throughout which every fan will ramp again as much as 100%. This step will end in a couple of minutes, proper after Fan Management finishes calibrating the followers it detected. In case your case followers are daisy-chained, Fan Management will present them as a single fan, since they solely use a single fan header.

Now you’ll be able to check the followers which have been detected and title every one. Since my two case followers are daisy-chained to a single fan header, they present up as a single fan. In case your case followers are individually linked to the motherboard, regulate every fan’s slider and test which one ramps up or slows down. When you establish which is which, title them accordingly. You’ll be able to rename followers no matter you need.
When you’re completed, click on “OK.”

The app will then ask you to regulate just a few extra settings, akin to startup habits, and that is it! Now you’ll be able to create customized fan curves, additional check every fan, and do no matter you need.
Personally, I am utilizing two customized fan curves. The primary is a flat CPU fan curve set at 80%, which means my CPU fan always runs at 80% of its max velocity. The second curve is a case fan curve with the GPU hotspot sensor chosen because the supply. When the GPU hotspot is beneath 50 levels Celsius, the 2 case followers run at 600RPM and are inaudible. As soon as the GPU is below load and its hotspot reaches 60 levels Celsius, the case followers ramp as much as 1200RPM.

I did not create a customized GPU fan curve as a result of the default one works moderately properly.
Whereas creating customized fan curves is comparatively simple, you’ll be able to watch JayzTwoCents’ video if you happen to want a tutorial on find out how to create and tweak completely different fan curves.
In order for you an in-depth video tutorial, the Onslaught PC YouTube channel has created an impressive, over-an-hour-long tutorial that covers each potential factor you are able to do in Fan Management.
For those who ask me, Fan Management is the final word fan administration software program on Home windows. Probably the most spectacular factor about it’s {that a} single developer has constructed an app that is mild years forward of what big-name manufacturers within the PC fan area, akin to Corsair and Lian Li, provide.
Fan Management works nice on just about each Home windows PC, receives common updates (the most recent model on the time of writing is 245), and is likely one of the best open-source apps for Windows. I wholeheartedly advocate it to each PC proprietor who needs to regulate their system’s followers — whether or not by making a easy fan curve the place the GPU temperature controls the case followers’ velocity, or establishing a complete fan management system with a bunch of customized curves that cowl each situation.
Source link