

![]()

To attach a Swap Professional Controller or third-party controller to your Nintendo Swap, use the “Sync” button or the USB-C charging cable. To attach Pleasure-Cons to your Nintendo Swap, use the “Sync” buttons or slide them into your Nintendo Swap’s sides.
There are a number of methods to attach a wi-fi controller to your Nintendo Swap. No matter whether or not you’re utilizing Pleasure-Cons, a Switch Pro Controller, or a third-party controller, connecting your controller is easy.
Find out how to Join a Swap Professional Controller to Your Nintendo Swap
There are two methods to attach a Swap Professional Controller to your Nintendo Swap: wirelessly with the “Sync” button and with a USB-C cable.
Nevertheless, for some third-party controllers that imitate the Swap Professional Controller, chances are you’ll solely have one choice: utilizing the “Sync” button or that third-party controller’s distinctive equal.
Find out how to Join a Swap Professional Controller Wirelessly
To wirelessly join your Swap Professional Controller to your Nintendo Swap, go into the Controllers menu on the backside of your Nintendo Swap’s display screen (the icon has a picture of a Pleasure-Con controller). Subsequent, choose “Change Grip/Order.”

At this level, you have to press and maintain (long-press) the “Sync” button to attach your Swap Professional Controller to your Nintendo Swap. The “Sync” button is situated on the prime of your controller; subsequent to the USB-C port.

After you let go of the “Sync” button, you’ll see your Swap Professional Controller’s icon seem on-screen. Press the A button to verify the connection and also you’re executed. This technique additionally works with the Nintendo Swap Lite.
Find out how to Join a Swap Professional Controller with a USB-C Cable
If you wish to join a wi-fi controller to your Nintendo Swap with out the “Sync” button, all you have to do is join your Swap Professional Controller and your Nintendo Swap with the USB-C cable that got here together with your Swap Professional Controller.

First, plug the USB-C finish of the cable into the USB-C slot on prime of your Swap Professional Controller. Then, plug the USB-A (additionally identified merely as USB) finish of your cable into one of many USB-A ports in your Nintendo Swap’s dock.

When you do that, your Swap Professional Controller mechanically connects together with your Nintendo Swap. The USB-A ports (there are two of them) are on the bottom-left aspect of your Nintendo Swap’s dock. The Nintendo Swap (the pill half) have to be within the dock for this charging cable connection technique to work.
Find out how to Join a Third-Get together Controller to Your Nintendo Swap
Many third-party controllers act the identical as Swap Professional Controllers with regard to connecting them to your Nintendo Swap wirelessly. Nevertheless, typically third-party controllers have completely different buttons.
![]()
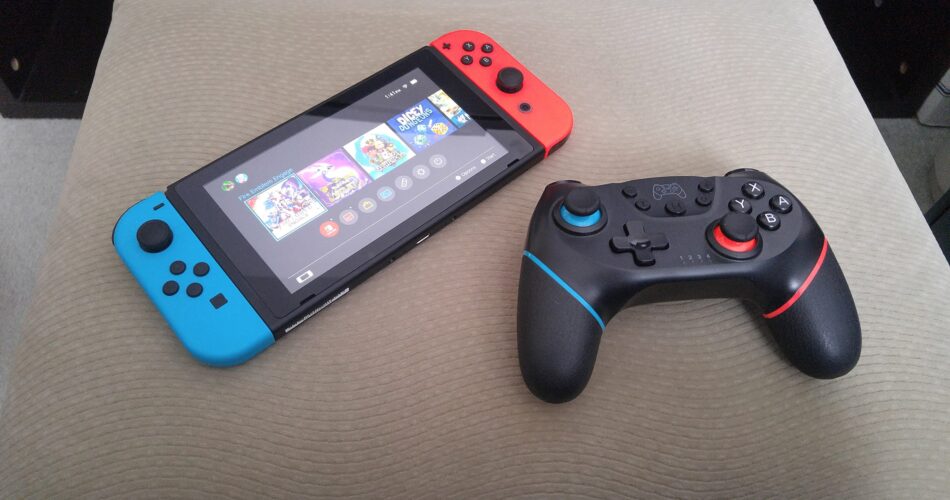
For instance, the “Sync” button and the “House” button could also be mixed right into a single button distinctive to that third-party controller. As such, you should use the wi-fi connection technique talked about above to get the identical outcomes as a Swap Professional Controller to your third-party controller—so long as your third-party controller has a “Sync” button of some type.
With that stated, some third-party controllers can’t use a USB-C charging cable to connect with your Nintendo Swap. We examined the Sefitopher Wireless Pro Controller (pictured above) and it couldn’t connect with our Nintendo Swap with a USB-C charging cable—regardless of charging the controller’s battery.
Find out how to Join Pleasure-Cons to Your Nintendo Swap
Like with the Swap Professional Controller, there are a number of methods to attach your Pleasure-Cons to your Nintendo Swap. Although, the Pleasure-Cons have much more choices!
You need to use the “Sync” buttons, slide them right into a Pleasure-Con grip and press any buttons, or connect them on to your Nintendo Swap.
Find out how to Join Pleasure-Cons Wirelessly
To wirelessly join your Pleasure-Cons to your Nintendo Swap, begin by going into the Controllers menu. Then, choose Change Grip/Order.
Following this, press and maintain (long-press) the “Sync” button on each Pleasure-Cons. The “Sync” buttons for the Pleasure-Cons are situated on their respective flat sides between the SL and SR buttons. Now, let go of the “Sync” buttons.

Afterward, you could press the L button on the left Pleasure-Con (the one with the “-” image on the prime) and the R button on the appropriate Pleasure-Con (the one with the “+” image on the prime).

Alternatively, you should use the ZL and ZR buttons at this level. Lastly, press the A button on the appropriate Pleasure-Con to verify the connection. This units up your two Pleasure-Con controllers to work collectively as in the event that they had been one controller.
Find out how to Join Pleasure-Cons to Your Nintendo Swap with the Pleasure-Con Grip
This course of works a bit otherwise if you happen to’ve inserted your Pleasure-Cons right into a Pleasure-Con grip. As an alternative of urgent the “Sync” buttons on every Pleasure-Con, you possibly can press any button on both Pleasure-Con to get them to attach together with your Nintendo Swap.

Following this, you continue to must press both the L and R buttons or the ZL and ZR buttons. Lastly, like earlier than, press the A button on the appropriate Pleasure-Con to finish the connection.
Find out how to Join Pleasure-Cons to Your Nintendo Swap Individually
You may as well join every Pleasure-Con individually, which helps you to use a pair of Pleasure-Cons as two controllers as a substitute of 1. To do that, go to the Controllers menu after which choose Change Grip/Order.
Then, long-press the “Sync” button on one of your Pleasure-Cons. After releasing the “Sync” button, press the SL and SR buttons on solely that Pleasure-Con’s flat aspect.

This leads to one Pleasure-Con being linked to your Nintendo Swap by itself. Do the identical together with your different Pleasure-Con and also you’ll have two impartial controllers linked to your Nintendo Swap.

This can be a nice strategy to regionally play video games with another person with out having to purchase extra controllers. You may as well connect your Joy-Cons to your PC, however the technique of doing so requires utilizing Bluetooth.
Find out how to Connect Pleasure-Cons to Your Nintendo Swap
If you wish to join your Pleasure-Cons to your Nintendo Swap in a non-wireless means, you need to slot the Pleasure-Cons into both aspect of your Nintendo Swap.

Seize your Nintendo Swap (the pill half) and have a look at its left and proper sides. You’ll see grooves on either side. Maintain the left Pleasure-Con in order that its flat aspect is dealing with the left aspect of your Nintendo Swap.

Utilizing a downward movement, slide the left Pleasure-Con gently into the highest of your Nintendo Swap’s left groove. When it’s absolutely in place, you’ll hear a small click on.
Do the identical to the appropriate Pleasure-Con on the right-side groove of your Nintendo Swap and also you’re executed! Now that your Pleasure-Cons are linked to the physique of your Nintendo Swap, you should use it as a handheld console.

How Many Controllers Can You Connect with a Nintendo Swap?
You’ll be able to join as much as eight controllers to your Nintendo Swap. This contains Swap Professional Controllers, Pleasure-Cons, Gamecube controllers, and third-party controllers. That is true each when your Nintendo Swap is linked to a TV and when it’s not.
With that stated, every Pleasure-Con counts as its personal controller—even when paired collectively. Whilst you can join a complete of eight Pleasure-Cons to your Nintendo Swap, if you happen to pair all of them, solely 4 gamers can play collectively. Nevertheless, if you happen to join eight Pleasure-Cons individually, you possibly can have as much as eight gamers play collectively.

You’ll be able to combine and match controllers as nicely. For instance, you possibly can join two Pleasure-Cons as one controller after which join six Swap Professional Controllers to 1 Nintendo Swap. Remember that this instance leads to a most of seven gamers having the ability to play collectively on one console (one participant utilizing a pair of Pleasure-Cons and the opposite six utilizing Swap Professional Controllers).
For extra examples of multiple-controller setups to your Nintendo Swap, seek the advice of Nintendo’s official support page on this topic.
Source link