

![]()
A bigger construct platform means you may make larger prints.
AppleInsider might earn an affiliate fee on purchases made by means of hyperlinks on our website.
The Creality Ender-3 Max Neo is a superb starter 3D printer for individuals who need to produce a lot larger plastic creations than you’d usually get on an entry-level printer.
After fairly just a few years and from extremely technically-minded origins, 3D printing has grow to be way more mainstream. Positive, it is not fairly widespread sufficient for everybody to have their very own miniature Star Trek replicator of their dwelling, but it surely’s actually extra well-liked.
A minimum of well-liked sufficient for there to be lots of of various 3D printers available for purchase. On the worth finish of the market, a minimum of, it’s populated by 3D printers with the identical look, vaguely comparable core specs, and basic pricing.
We’ve already checked out Creality’s Ender 3 V2 Neo 3D printer, and whereas it’s a completely good 3D printer for these beginning the pastime, it is not essentially the only option in your wants.
If in case you have plans for larger prints, you will have two choices. Both you create a mannequin in elements assembled after the very fact, otherwise you get a much bigger printer.
Ender-3 Max Neo 3D Printer – Essential specs
- Printer Kind: Fused deposition modeling (filament printer)
- Printer dimensions: 516mm by 582mm by 590mm (20.3 by 22.9 by 23.2 inches)
- Construct Quantity: 300mm by 300mm by 320mm (11.81 by 11.81 by 12.59 inches)
- Construct plate floor: Carborundum Glass
- Warmth mattress max temperature: 100C
- Variety of nozzles: 1
- Printing precision: 0.1mm
- Layer top: 0.05mm to 0.35mm
- Nozzle max temperature: 260C
- Extruder kind: Full-metal Bowden extruder
- Rated energy: 350W
Ender-3 Max Neo 3D Printer – Preliminary setup
In comparison with a standard printer, a 3D printer can appear fairly intimidating to arrange. Your customary inkjet or laser printer solely wants you to unpack it, insert the ink cartridge or toner, add within the paper, join it to your Mac indirectly, and then you definately’re off to the races.
An FDM 3D printer, however, has utterly totally different workings to your customary printer. There are various extra visible shifting elements, melted plastic, and lots of extra parts that should work accurately.
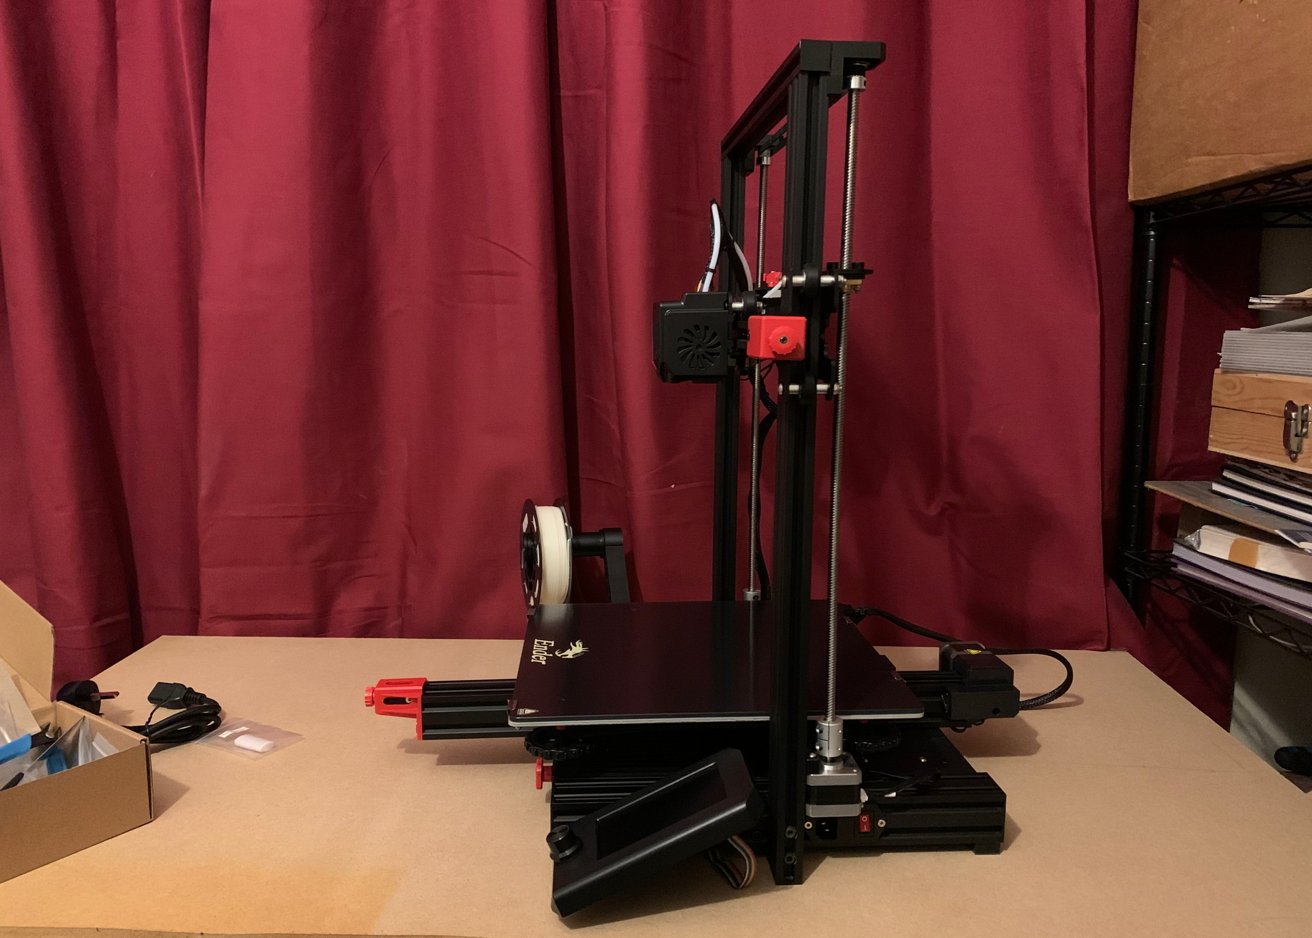
After opening up the massive field, you are greeted with an unexpectedly easy meeting course of for the Ender-3 Max Neo. For a begin, it is in three essential sections: the gantry that holds the extruder, the bottom with the primary electronics and the construct plate, and a management panel.
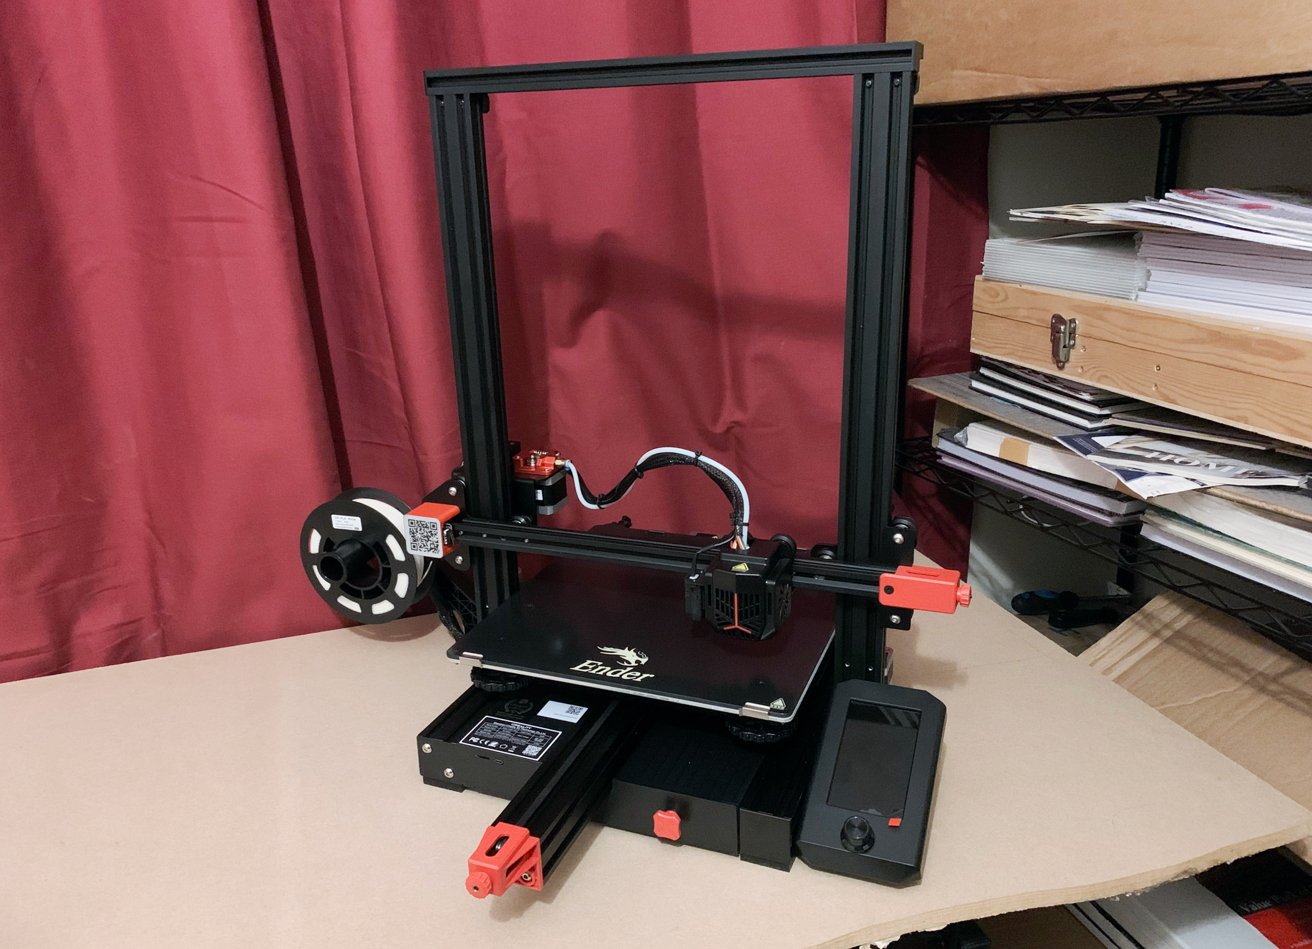
Creality makes use of the identical design within the Ender 3 Max Neo as within the V2 Neo, solely in a a lot larger type.
It’s extra involving than a typical printer setup course of however removed from what it might be. You solely want to put in a small variety of screws to connect the gantry to the bottom, join the management panel, plug in some cables, and ensure there’s nothing tangled or that can intervene with the printing course of.
After that, you have received a plastic holder to connect to the aspect of the printer, the place the spool of filament resides. Then you need to feed the filament by means of the filament-detecting sensor and a skinny tube to the extruder itself.
This contains passing the filament by means of the full-metal Bowden extruder, which is extra sturdy than Creality’s beforehand used. This consists of a mechanism to repeatedly push the filament by means of to the extruder head, which it does with a good quantity of pressure.
Certainly, that is way more to contemplate than the standard printer, but it surely’s far much less work than most will suppose there’s to get began.
Ender-3 Max Neo 3D Printer – Larger is healthier
The first and noticeable distinction between the Ender-3 Max Neo and different fashions, just like the Ender-3 V2 Neo, is its dimension. Because the title suggests, this printer can create a lot bigger prints than another entry-level printers.
For instance, its stablemate Ender-3 V2 Neo has a construct quantity measuring 220mm by 220mm and 250mm in top (8.66 inches by 8.66 inches and 9.84 inches tall). The Ender-3 Max Neo as a substitute works at a most scale of 300mm by 300mm and 320mm in top (11.81 inches by 11.81 inches by 12.5 inches).
A 36% enhance in size and width, and 28% extra top, in easy phrases, means you can print out bigger stuff.
The added top permits you to construct a lot taller prints than standard
It might be argued that you would print a big object in smaller sections on a extra normal-sized 3D printer after which assemble them afterward. That is true, however the bigger bodily capability means there’s extra likelihood of printing out that bigger object in a single go.
This might prevent from having to take care of seams if you happen to’re gluing smaller sections collectively.
Ender-3 Max Neo 3D Printer – Design
The printer’s design is easy but additionally made to be easy and sturdy. As soon as assembled, the whole unit feels fairly stable and never wobbly within the slightest.
The gantry, which raises and lowers the extruder, could be very steady and advantages from twin Z-axes, particularly synchronized motorized screws on either side for elevating and reducing the extruder arm. These screws maintain the extruder good and stage, and regular all through a print.
How the printer works is that the extruder strikes left and proper by itself horizontal arm between the 2 vertical sections of the gantry. The arm is raised and lowered by the gantry whereas the construct plate strikes forwards and backwards.
It might have the phrase ‘Max’ within the title, but it surely’s not a large printer…
With the extruder and construct plate actions, the extruder can first pump out melted filament onto the construct plate. Then, as soon as the layer has completed, the gantry’s screws elevate the extruder by a small quantity, and the method goes once more, utilizing the primary printed layer as a base for a brand new layer.
Whereas the V2 Neo we reviewed used a detachable magnetic mattress that may be bent, the Max Neo used a glass plate as a substitute. Whereas not bendable, it will probably nonetheless be eliminated by unfastening a pair of clips, making cleansing simpler.
You will discover a assortment of knobs beneath the construct plate for leveling it. Below that, included in the primary base part, there is a drawer meant for all of the bits and items it’s possible you’ll accumulate over your printing profession.
Ender-3 Max Neo 3D Printer – Interfaces and preparation
As with most different 3D printers, on the point of print is a little bit of a chore the primary time you do it, however it’s a needed a part of the method.
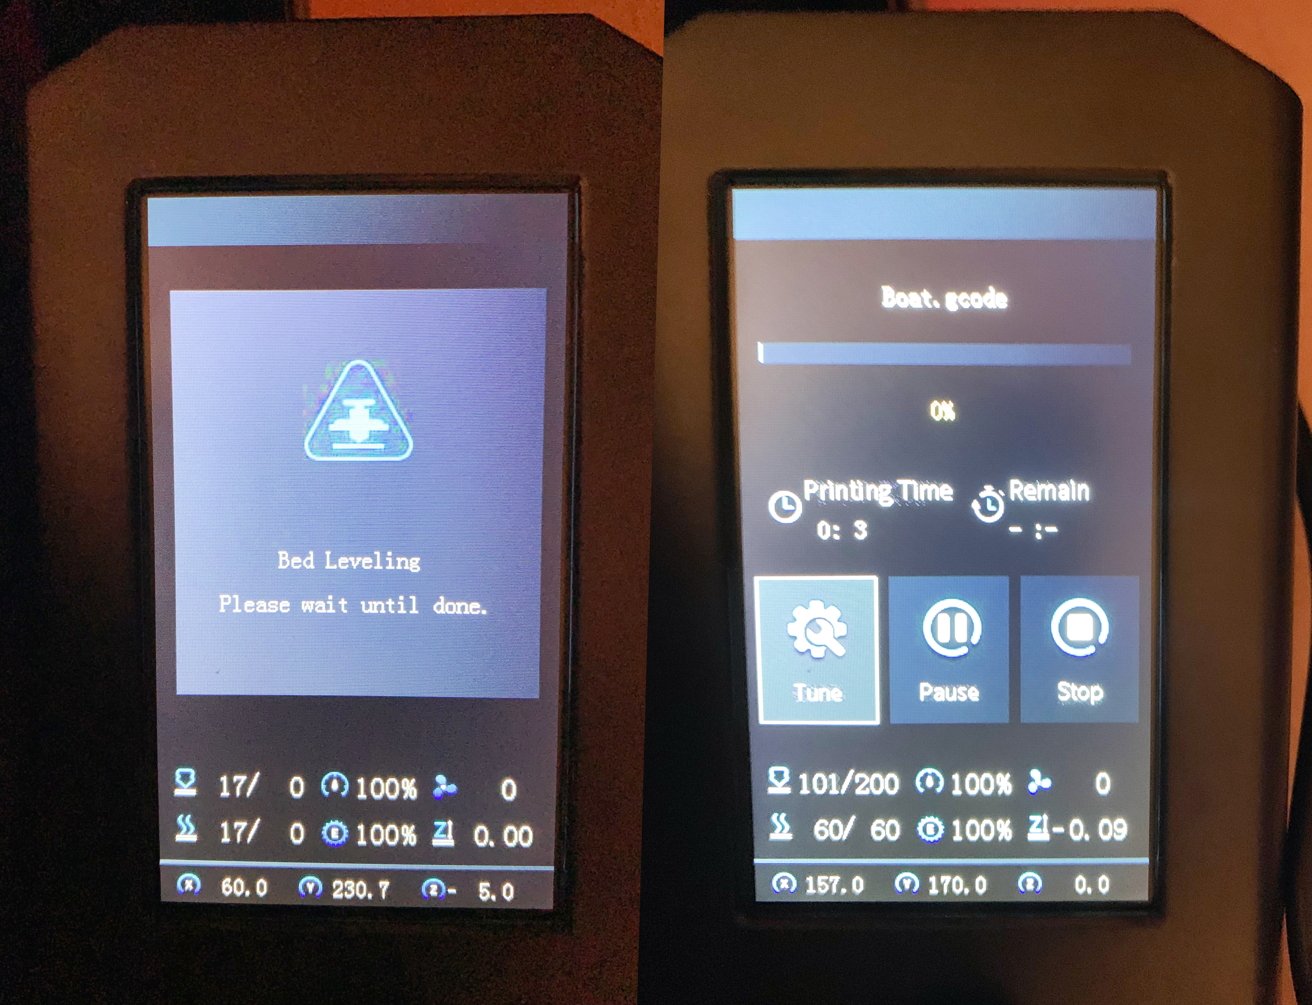
This contains the dreaded leveling of the construct platform, which requires you to slip a chunk of paper between the extruder head and the platform in all 4 corners, adjusting utilizing the below-platform knobs just a few instances till it’s as shut as you will get it.
There’s additionally an automatic leveling operate, which makes use of a sensor subsequent to the extruder to map out variances in a grid, which it then takes under consideration for the print itself. Ideally, this could work by itself, however doing it manually will get you a lot of the approach there.
The principle interface itself consists of the aspect management field, which is managed by a single clickable knob. Rotating takes you thru the varied menus, on the 4.3-inch show, with clicking choosing gadgets or backing you out of menu choices.
In an ideal world, this may be a touchscreen, however because it may feasibly be utilized in a dusty workshop by somebody sporting gloves, the knob will do exactly wonderful.
The management field would not have a touchscreen, but it surely does have a pleasant dial interface.
This controller handles all the primary parts, together with setting the precise positioning of the extruder, offsets, temperatures for the extruder and construct platform, construct speeds, and different adjustable components. It is also used to pick the print from the microSD card plugged into the entrance and to begin and cease the prints if needed.
The 3D fashions, both acquired from sources like Thingiverse or made in instruments like Blender, are all ready through a slicing device. After all, you would use Creality’s personal if you want, however others, equivalent to Ultimaker Cura, additionally work simply wonderful.
The sliced print information are then put onto the microSD card, both through Creality’s equipped USB adapter or your individual different, with the cardboard then plugged into the printer itself on the entrance.
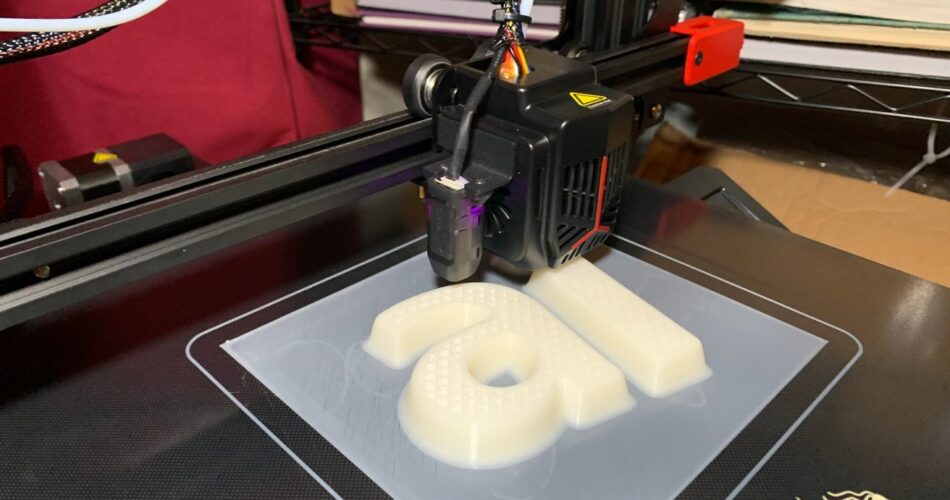
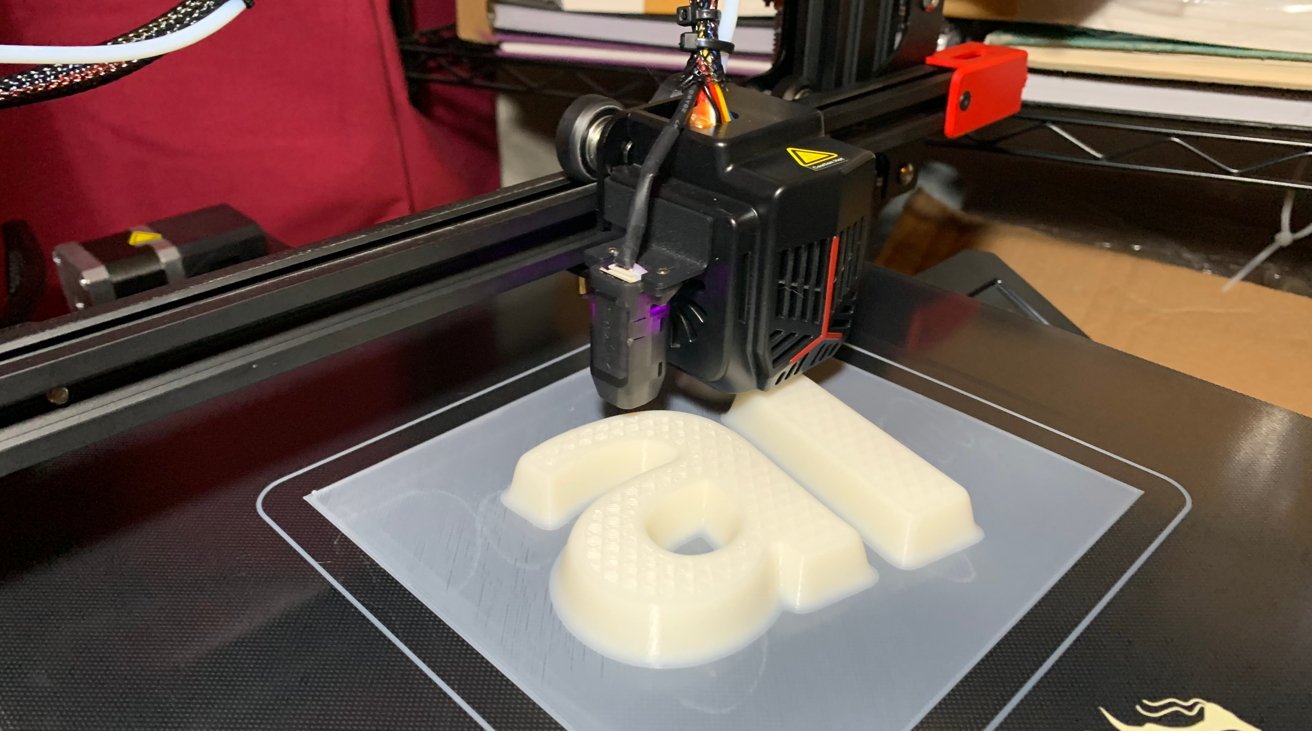
As soon as the cardboard is in, you’ll be able to choose the print utilizing the management field and set all of it going. After reaching temperature, the printer will begin depositing scorching filament onto the construct platform, creating the piece layer by layer.
Although not instantly, you will notice a timer seem on the management field’s show, displaying an estimate of how for much longer you need to anticipate the print to complete.
Relying on the dimensions of the print itself, in addition to the way you set the fill and different settings, a print can take just a few hours or sufficient to stretch right into a second day. With the additional dimension of the platform itself and the peak of the printer, super-sized prints will simply fall into the latter class.
Ender-3 Max Neo 3D Printer – Printing and Upkeep
Whereas half of the battle is getting to a degree the place you’ll be able to print, the opposite half offers with the print afterward and conserving the printer in high situation, prepared for the following.
After printing finishes, the mannequin takes a little bit easing to get it away from the textured glass base utilizing the equipped scraper, however generally only a gentle stress will do.

Printing 3DBenchie onto the textured glass construct platform. Word the sensor used for the auto-level characteristic.
You will virtually actually have to wash the glass base every time you print resulting from some PLA residue, however that may be simply dealt with with some IPA and a microfiber fabric. Simply two clips on the entrance permit you to pull out the glass sheet itself, making cleansing a lot simpler to deal with.
As for the filament, the metallic mechanism that forces the fabric ahead can be used to launch it, in case you need to change colours, for instance. A press ahead of a tab removes the stress utilized to the filament, permitting you to drag it from the feeding sheathe.
Very similar to in our Ender-3 V2 Neo assessment, there’s a studying curve relating to fine-tuning the printer, figuring out temperatures for particular filaments, and so forth. Sadly, there’s little that may be finished about these steps, and customers ought to be doing this prep work after they change printers or filaments anyway.
As for what comes out of the printer, we did encounter some stringing at instances, however that’s largely a preparation challenge and never all the way down to the printer itself.
For the reason that printer is so easy in its design, a minimum of relative to others, many bits will be tightened or tidied up on the machine utilizing easy instruments or the instruments equipped by Creality. In case you’re adventurous, you would print and add your equipment, with the totally different arms and body parts fairly able to accepting no matter attachments you provide you with.
Ender-3 Max Neo 3D Printer – Enclosures
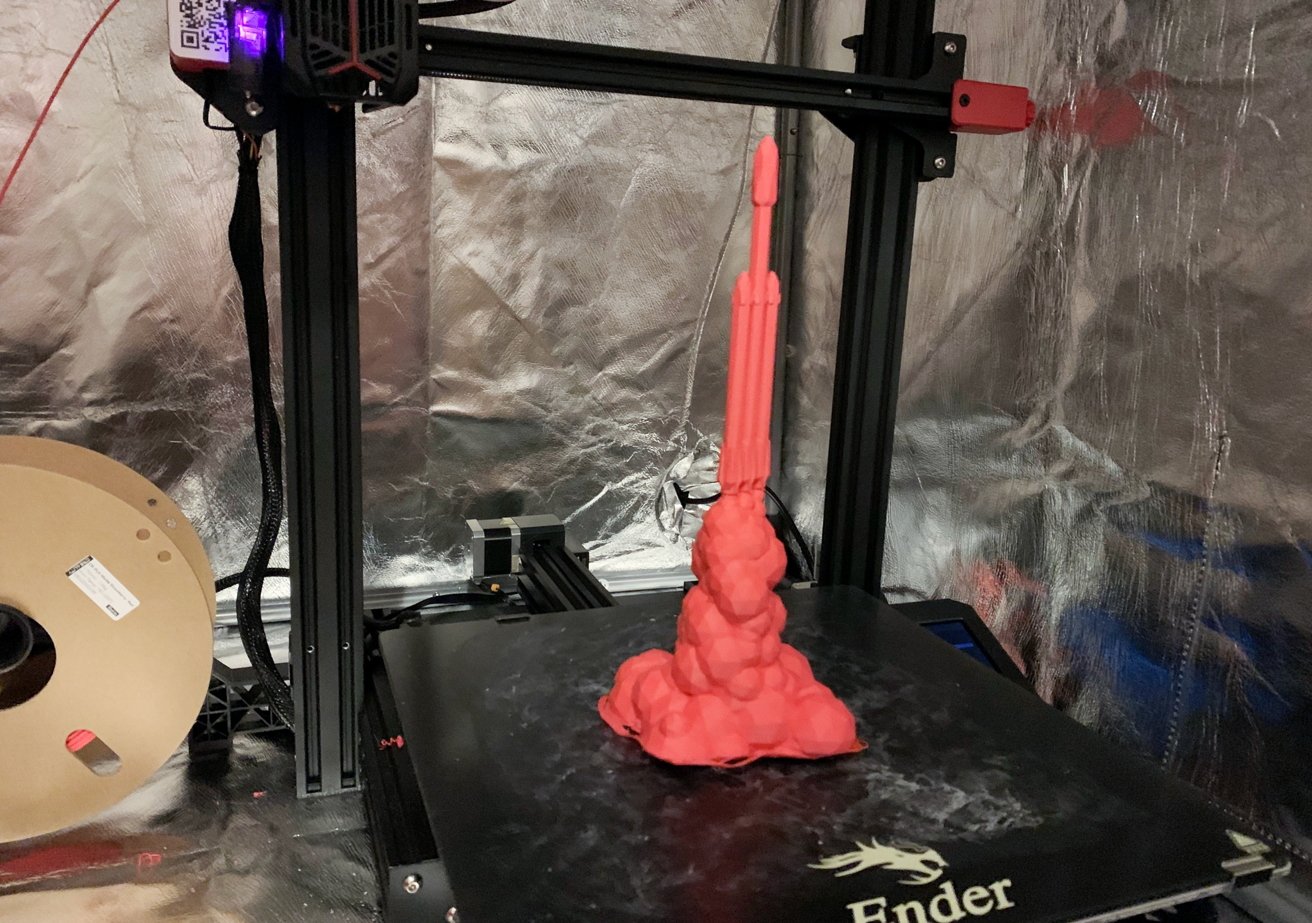
Whereas not a part of the preliminary package deal, Creality did ship an enclosure to help with the assessment. As well as, issues over print points brought on by the printer’s location close to a window and a chilly home resulting from an power disaster in the course of winter led to at least one being supplied as a part of the check.
A $109.99 to $129.99 accent, the 3D Printer Multifunction Enclosure consists of a cuboid field that has a footprint of as much as 27 inches by 29 inches and as much as 35 inches in top, relying on the chosen dimension.

Enclosures are completely optionally available however might be useful relying in your surroundings.
This field consists of a black material outdoors and a thermal insulation layer that’s silver in shade on the within, held up by a really sturdy metallic body. A gap on the aspect permits for energy cables to go out and in of the field when it’s closed up, and a aspect pocket is offered for holding instruments.
On the entrance and high is a zip-sealed flap, full with a window, which supplies you entry to the printer itself.
The enclosure goals to guard the printer and the print from the “parts” of your workspace, together with water and dirt. Its materials additionally helps maintain the air temperature instantly across the printer toasty, so the filament and the printer itself will not be affected by any coldness within the air.
The enclosure additionally barely dampens the sound of the cooling fan on the 3D printer, which is a small bonus.
Whilst you might not essentially require an enclosure in your workspace, buying one might be a good suggestion if it can assist with the precise printing course of. You can get away with a large cardboard field in a pinch, however a made-for-purpose enclosure is a greater concept if you happen to can afford it.
Ender-3 Max Neo 3D Printer – A much bigger printer for grand designs
So far as price range 3D printers go, Creality’s Ender-3 V2 Neo is an efficient selection for a lot of customers getting began within the pastime. Because it shares a lot of the identical options and performance, the Ender-3 Max Neo can actually be thought-about in the identical class.
It is fairly straightforward to make use of and perceive, fast to get going, and with flexibility in each catering to those that simply need to print stuff and people who need to delve deeper.
The place the Ender-3 Max Neo is a superb selection when you need to contemplate making a lot larger prints. With its a lot bigger construct platform and top, you’ll be able to actually make some hefty prints if you happen to put your thoughts to it.
If value is an element, the Max Neo will all the time lose out to the V2 Neo, just because the V2 Neo prices $299 and the Max Neo is $369. If dimension can be a priority, then the smaller house the V2 Neo takes up can even make it a extra enticing proposition.
However, if you happen to’re prepared to spend the additional $70 and are prepared to create space for it, the Ender-3 Max Neo is actually a very good purchase. Chances are you’ll not must print one thing that massive anytime quickly, but it surely’s good to know you will have the potential to take action if wanted.
Ender-3 Max Neo 3D Printer – Execs
- Easy meeting
- Straightforward to navigate controls
- Good worth on value
- Stable full-metal Bowden extruder
Ender-3 Max Neo 3D Printer – Cons
- Fiddly preliminary levelling
- 3D printing nonetheless has a steep studying curve
Ranking: 4 out of 5
The place to purchase the Ender-3 Max Neo 3D Printer
Get the Ender-3 Max Neo 3D Printer from the Creality retailer for $369. A 3D printer enclosure will also be discovered on the Creality web site for $87.99, a $22 low cost.
Source link