

![]()
Confused about how to set up emails for a new Shopify store?
Yes, Shopify email setup can be tricky, especially for folks without previous experience or technical background.
That’s why we created this simple guide.
Keep reading to learn how to set up Shopify email in less than an hour.
Shopify Email requirements
First things first:
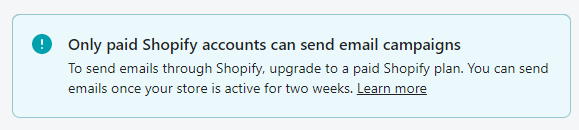
You can only use the Shopify Email app if your store has a paid subscription. If you’re still on the trial plan, Shopify allows sending test emails to yourself only.
So—
Make sure you bought a paid plan before starting the Shopify email setup. The cheapest subscription costs $29/mo. See the Shopify pricing plans here.
Shopify email setup
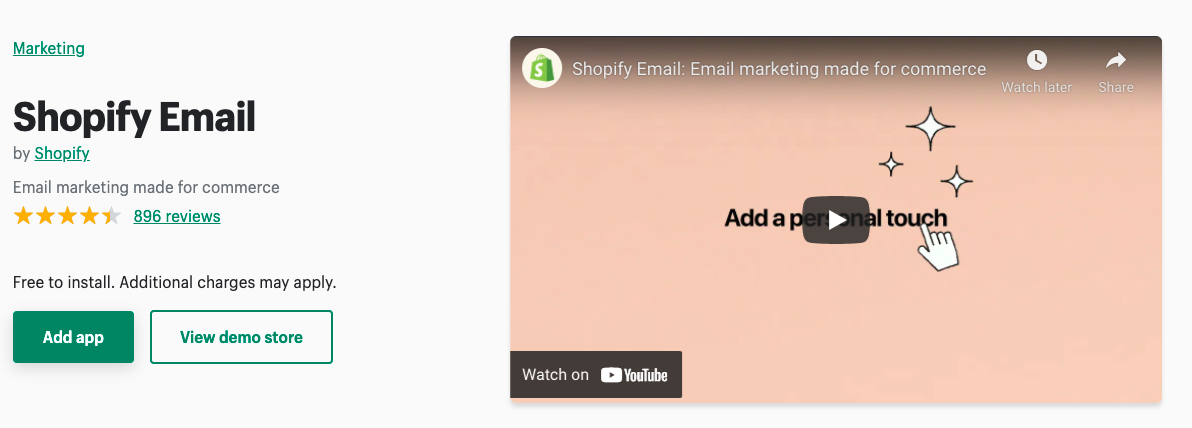
Go to the Shopify Email app page to begin.
Click Add app and follow the instructions to start the installation.
Logging into Shopify is required to continue.
Once you’re logged in—
Click Install App.
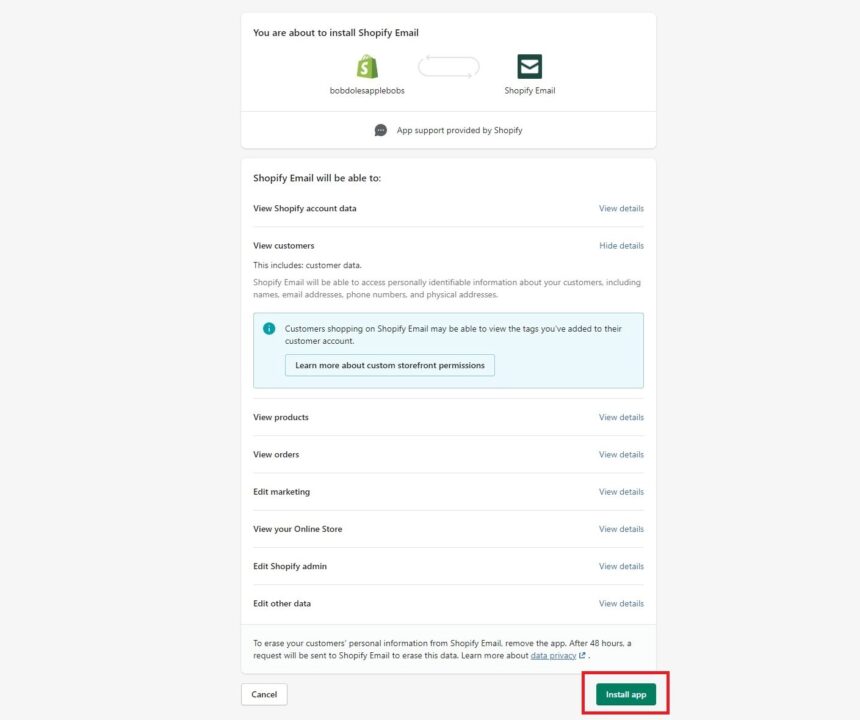
In about five seconds, Shopify Email will be ready to use.
One important note:
Shopify doesn’t host your emails. More specifically: you can’t reply directly to your customers from your Shopify email. Instead, they offer two options: email forwarding and third-party hosting.
Forwarding means your emails will have @shopifyemail.com at the end. In this case, the messages won’t look very professional. But if you’d like to use this option, use the Add forwarding email address in Domains (now under Settings) in the Shopify dashboard. This option is only available for custom domains (not ending in myshopify.com) purchased through Shopify.
Watch Shopify’s walkthrough here:
Third-party hosting means using another service to host your emails. It’s a great option that many stores use. With Shopify, you can select between Google Workspace and Zoho Mail.
To add a third-party email hosting service—
Go to Online store > Domains and click your domain under Shopify-managed domains. The Domains option will only be visible if you’ve purchased a custom domain through Shopify.
Click on Manage. There, in the Email section, choose Use third-party hosting service.
This window will appear, allowing you to make a choice.
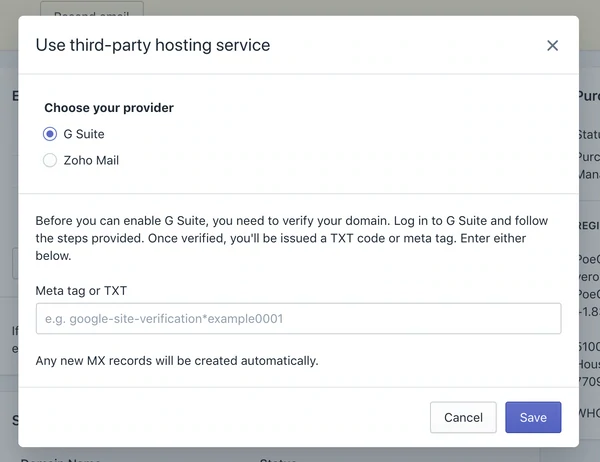
The meta tag or TXT that you see on the picture can be obtained from your chosen email hosting provider.
You can also watch a video walkthrough from Shopify:
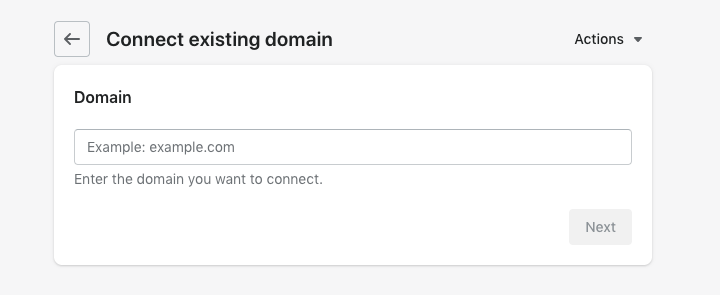
To connect your Shopify store to any of those two email hosting services:
Go to your Shopify dashboard > Settings > Domains.
There—
Click Connect existing domain and type in your store’s URL.
If your store is registered with these Shopify partners, an option to connect automatically will appear.
Here’s how it looks.
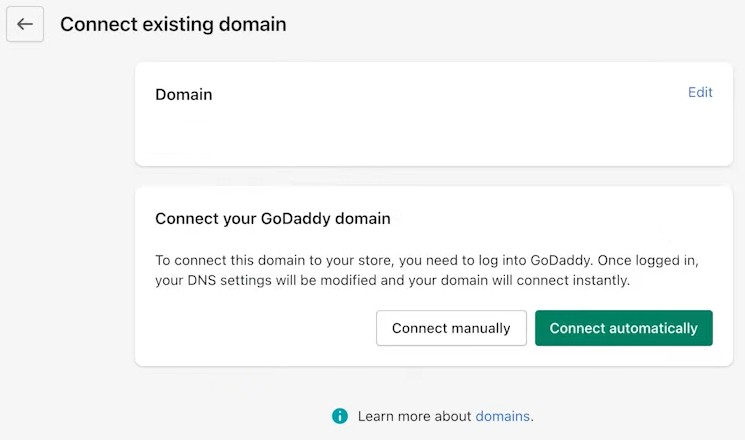
Click Connect automatically and follow instructions.
How to add SPF and DKIM records to Shopify
If you chose a third-party Shopify email hosting provider—
Shopify says you need to add Sender Policy Framework (SPF) records and Domain Keys Identified Mail (DKIM) records to your account.
Otherwise, your emails will be shown as being sent from [email protected] or, worse, flagged as spam.
To add Shopify SPF and DKIM:
- Go to Settings in your dash
- Click Edit in Contact Information
- Choose Fix this
- Click Authenticate in Sender email
- Enter SPF and DKIM according to instructions
Once this is done, you can feel confident that your emails will be delivered to customers. If you need more help with this step, see this SPF & DKIM records guide.
Shopify email marketing with Omnisend
Shopify Email is an okay email marketing option with an average rating of 4.4 stars. Users are generally satisfied but many reviews suggest a lack of automation and too few templates.
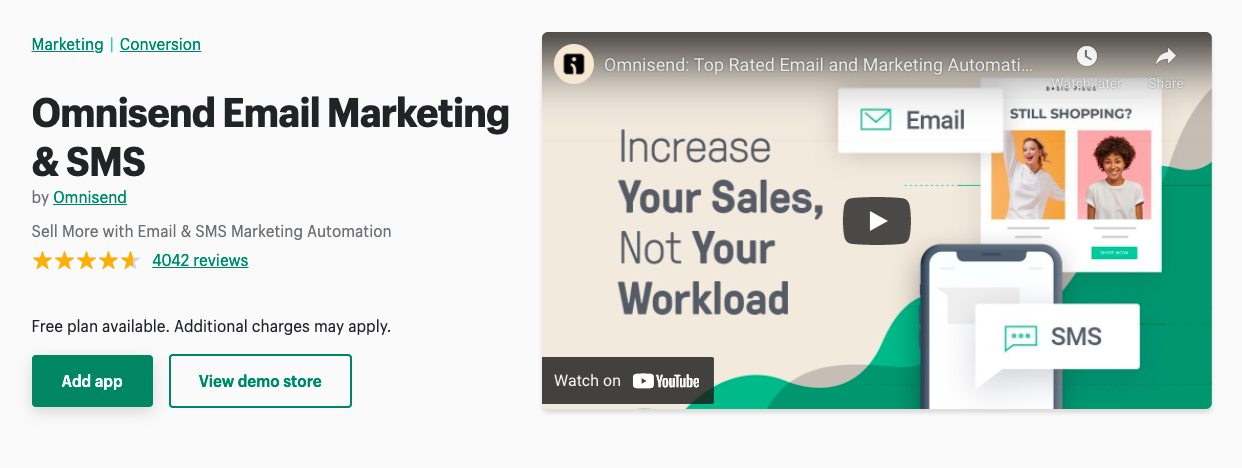
If checking out some alternatives is something that crossed your mind, let us suggest Omnisend.
You get:
- Top-rated customer support
- Free plan with 500 emails/mo
- Best-in-class email automations
- Stunning email templates
- SMS marketing features
The app has 3,600+ 5-star reviews from Shopify users.
If you’re interested—taking Omnisend for a spin is easy (and free).
The basic steps:
Go to Omnisend’s page on the Shopify App Store and click Add app.
After that—
Click Install App.
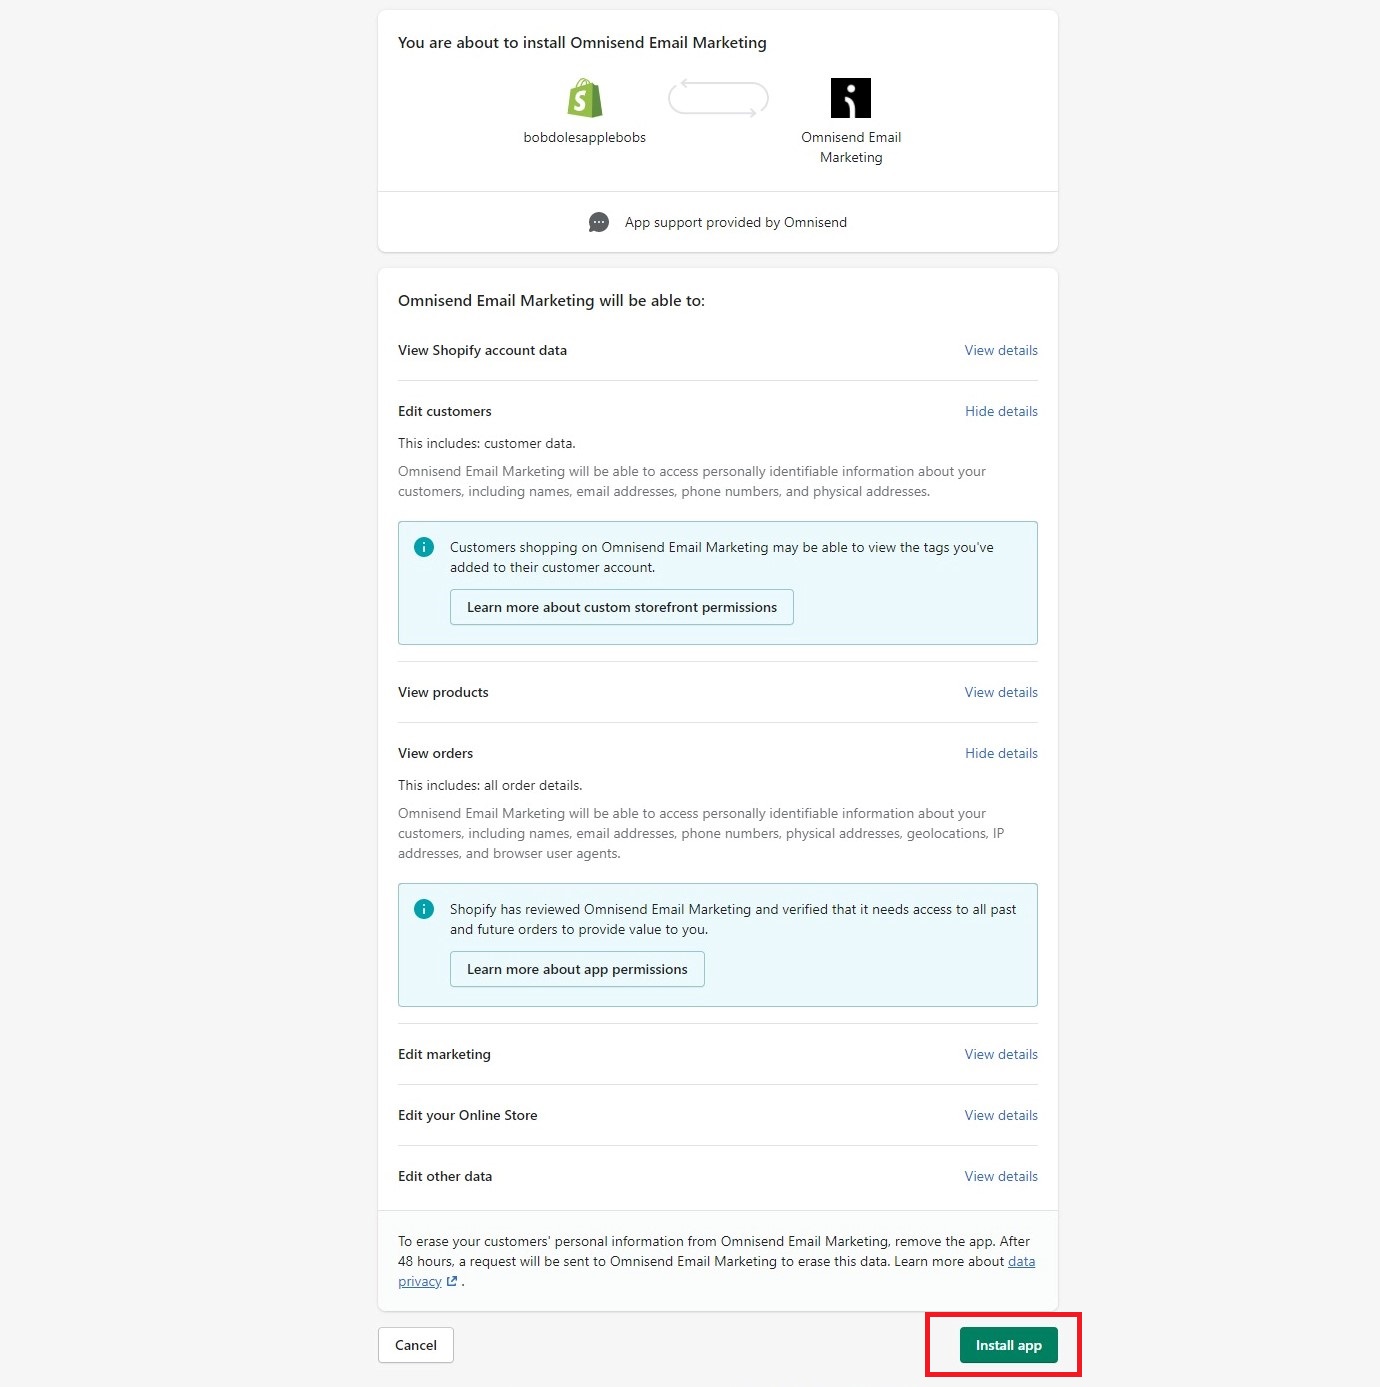
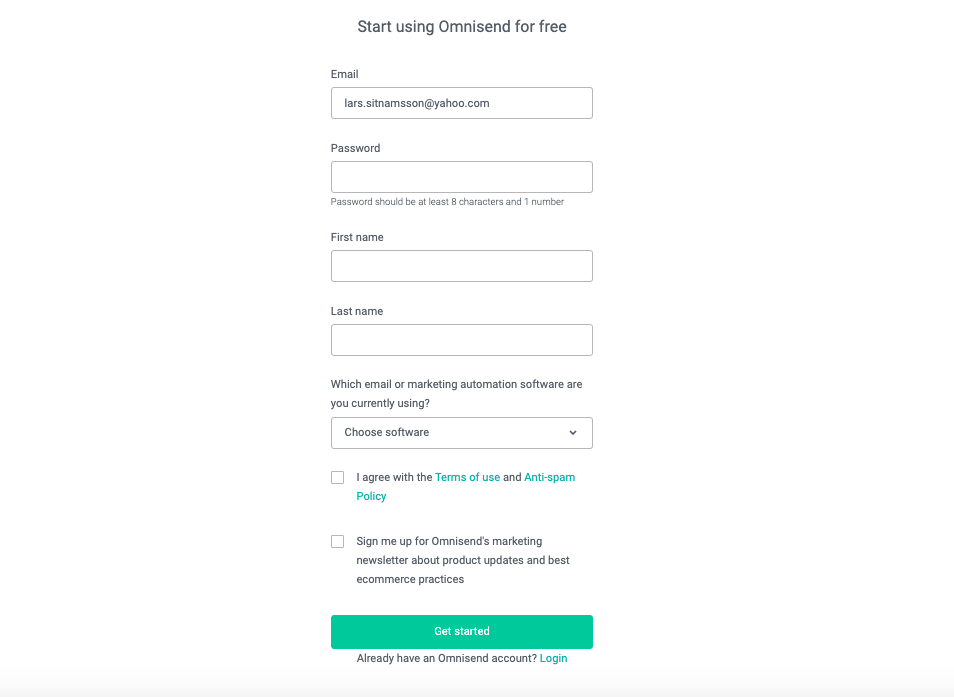
In just a few seconds, you’ll see the account registration window.
Create your free account by entering details like email, password, name, and others. Click Get Started to finish.
At this point, your account is created.
You should arrive at Omnisend’s welcome window. There, you’ll see four options to continue—you can learn the app, create a campaign right away, start collecting the emails of visitors, and make a cart recovery email.
Feel free to choose any option—Omnisend is extremely beginner-friendly, so you’ll even be able to create campaigns easily.

That’s it, you’re ready to do email marketing. Browse around, create your first campaigns, and check out the guides below to become better at email marketing.
Should you need any assistance—
See the complete guide to integrating Omnisend and Shopify.
Useful resources for Shopify email marketing
The right strategy can boost your email-generated revenues up to 460%. These handpicked resources from our blog will help you make email your main revenue channel.
Get started with Omnisend today & drive sales on autopilot with pre-built automation workflows
Source link