

![]()
Podman Desktop is a free different to Docker Desktop that’s one other nice possibility for native growth use. It provides an identical function set whereas remaining fully open-source, letting you keep away from the licensing implications of using Docker’s product.
On this article, you’ll discover ways to set up and get began with Podman Desktop to run containers and deploy to Kubernetes. The expertise can be acquainted when you’ve beforehand used Docker Desktop but it surely also needs to be fast to choose up anew.
What Is Podman Desktop?
Podman is an OCI container engine that you should utilize as an alternative of Docker. The Podman CLI is deliberately just like Docker’s; you’ll be able to convert most instructions by merely substituting podman as an alternative of docker, resembling podman run and podman push.
Podman Desktop is an official graphical interface for Podman’s performance. Along with wrapping the Podman CLI, it bundles further options together with Kubernetes integration and third-party extensions. You should utilize Desktop to conveniently work together with containers and associated sources in your workstation, if you wish to keep away from operating terminal instructions.
Getting Began
Be sure to’ve received the common Podman CLI installed earlier than you begin utilizing Podman Desktop. Desktop must detect the CLI to handle your containers. You will discover detailed set up directions in the Podman docs.
Subsequent, obtain the most recent Podman Desktop launch from the project’s website. Alternatively, use one of many following instructions to put in utilizing your system’s bundle supervisor:
- Home windows –
winget set up -e --id RedHat.Podman-Desktop - macOS –
brew set up podman-desktop - Linux –
flatpak set up --user flathub io.podman_desktop.PodmanDesktop
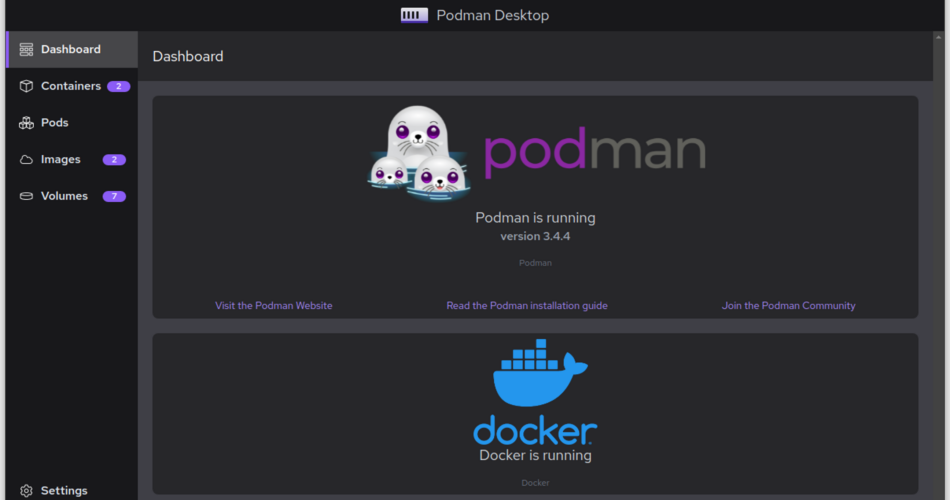
Now you’ll be able to launch Podman Desktop. It’s best to see Podman is efficiently detected. The homescreen will even show another container environments accessible in your system, resembling a Docker Engine set up.

Exploring Podman Desktop
Podman Desktop’s interface is break up into 5 major sections which you’ll change between utilizing the left sidebar. There’s additionally a separate Settings menu, accessed on the backside of the sidebar, the place you’ll be able to configure your container engines, allow HTTP proxies, and provide picture registry credentials.
Operating Containers
The Containers tab is the place you’ll spend most of your time. It shows all of the containers that exist in your surroundings. To create a brand new container, press the purple “Create container” button within the top-right.

You’ll be prompted to decide on between constructing a Containerfile or Dockerfile, or beginning a container from an present picture:

In the event you select “From Containerfile/Dockerfile”, you’ll want to pick out the trail to your file by clicking within the “Containerfile path” enter on the subsequent display screen. You should utilize any present Dockerfile; the Containerfile terminology is solely a extra generic different. Provide an preliminary tag to your picture within the “Picture Title” subject, then press the “Construct” button to construct your picture.

The construct command’s output can be proven in an embedded terminal window. Click on the Accomplished button to proceed. You’ll be taken to the Photos display screen the place your new picture can be displayed. In the event you decide to not construct a brand new picture, you’ll land on the Photos display screen after you press the “From present picture” button within the container creation dialog.
Subsequent, hover over any picture and click on the play button that seems on the proper aspect of the display screen:

Now you’ll be able to configure the properties of your new container occasion. Assign a reputation to your container, mount any volumes you require, and set surroundings variables on the “Primary” tab:

The Superior tab permits you to connect a TTY, set the person that the container runs as, and alter the restart policy that’ll apply:

Networking configures the container’s community stack, together with its hostname, /and so forth/hosts file entries, and DNS configuration:

Lastly, the Safety tab permits you to activate privileged mode (if you realize you require it), modify the container’s kernel capabilities, and specify a read-only filesystem when you count on an immutable surroundings:

When you’re performed configuring your container, click on the purple “Begin Container” button on the backside of the display screen to run it. It’ll present up again on the Containers display screen.

Managing Containers
Hovering over containers reveals actions that allow you to cease or delete them. It’s also possible to use the checkboxes on the left aspect to pick out a number of containers and apply actions in bulk.
Clicking the three dots button on the far proper reveals an overflow menu with extra choices. Right here, you’ll be able to instantly restart your container, or shortly launch a terminal session.

Click on any container to view its particulars. This yields a tabbed interface the place you’ll be able to entry the container’s logs, podman examine output, and terminal session.

Managing Photos
Photos are managed in an identical manner. Click on any picture to entry its particulars, together with its podman examine output and layer historical past.

Click on the “Pull Picture” button within the top-right of the Photos display screen to drag a brand new distant picture into your surroundings. You’ll be prompted to enter the picture you wish to pull, resembling ubuntu:newest or registry.instance.com/private-image:v1.

Podman will obtain the picture whenever you press the “Pull Picture” button. Progress is displayed in an inline terminal window.

To make use of photos in non-public registries, you’ll want to arrange authentication credentials first. Press the “Handle Registries” button on the Pull Picture display screen, or navigate to Settings > Add Registries, then press the “Add registry” button within the backside proper. Enter your registry’s hostname and provide your username and password. Click on the Login button to authenticate.

Managing Volumes
The Volumes display screen supplies an outline of all of the persistent volumes you’ve created, together with their age and complete measurement:

Clicking a quantity reveals its podman examine output:

You may delete a quantity by clicking the button within the top-right.
Utilizing Kubernetes
Podman has built-in Kubernetes assist. That is surfaced in Podman Desktop’s Pods display screen. Pods in Podman are equal to Kubernetes Pods, being a set of a number of containers which might be grouped collectively. To deploy a Pod, click on the “Play Kubernetes YAML” button within the top-right.

Provide the trail to your YAML file on the display screen that seems:

You should utilize this easy Pod manifest when you don’t have one accessible:
apiVersion: v1
form: Pod
metadata:
  title: nginx
spec:
  containers:
    - picture: nginx:newest
Whenever you click on the “Play” button, Podman will deploy the Pods outlined by your manifest. The created Pod IDs are proven within the embedded terminal window’s output.
You’ll now see your Pod seem on the Pods display screen:

Pods are nonetheless containers operating in Podman. To deploy to a actual Kubernetes cluster, develop the Pod’s three dots menu and choose the “Deploy to Kubernetes” motion.
On the subsequent display screen, select whether or not to exchange hostPort bindings with Kubernetes providers. That is safer because it prevents Pods being instantly certain to ports in your cluster’s Nodes. Click on “Deploy” to launch your Pod into your active Kubernetes cluster, as outlined by your ~.kube/config file. You may select a special cluster connection within the settings menu.

Podman Desktop incorporates comfort options for transferring between native containers and Kubernetes clusters. The “Kube” tab on the container particulars display screen supplies an auto-generated Kubernetes YAML file for any container in your surroundings, permitting you to deploy with out manually writing manifests.

Putting in Extensions
Podman Desktop helps most Docker Desktop extensions so you’ll be able to add customized performance. Extensions are distributed as container photos with specifically ready content material. You will discover them on Docker Hub by filtering to the Extension content material sort.
When you’ve discovered an extension you’d like to make use of, add it to Podman Desktop by heading to Settings > Desktop Extensions. Paste the extension’s picture title into the enter subject, then press the “Set up extension from the OCI picture” button. The set up logs can be proven beneath.

The extension’s UI will then be accessible again in the primary Podman Desktop interface, underneath the Extensions sidebar merchandise.

Abstract
Podman Desktop is a graphical instrument for managing Podman container environments. You may work together with the containers, photos, and volumes in your machine, deploy Kubernetes manifests, and monitor logs, all inside a single interface. Podman Desktop’s additionally suitable with Docker Desktop extensions so you’ll be able to entry extra integrations developed by the broader container ecosystem.
These capabilities imply Podman Desktop can usually be used as a drop-in alternative for Docker Desktop. You’ll want to stay with Docker when you depend on its collaboration, enterprise administration, and growth surroundings functions, although. Podman doesn’t supply something comparable to those, as an alternative specializing in offering a fast, light, and open container expertise.
Source link